Yellow Bullet Forums banner

:D 1996 Nissan 240sx LSx 4l80e Turbo - *daily driver*

23K views 35 replies 4 participants last post by  kingtal0n  
#1 · (Edited)
:)Hello Everyone I am new here, friendly helpful :smt077

It's a daily driver build, reliability and economy are epitomized.
I do not like cars that sit. This will be my only vehicle so I am pressured into finishing, maintaining, and putting high mileage on it.
:-KFC

Not my first build, but this is my first LS engine. Luckily I've been doing this 20years so everything comes naturally, i.e. cleanliness, torque sequences, tuning, wiring, etc... is easy for me.

I am full time graduate student focusing PhD Mechanical, and also working as a teaching assistant. I hope to write some control theory into a little black box(digital controller) at some point to manage those things which the factory ECU cannot, such as fuel safety feature and temperature control application.

:smt065


Ill write a few short sentences for pictures but overall, unlike other build threads of mine, I want to keep word count down and mostly focus on pics. Probably still going to write a lot though, but at least you know I didn't mean to.


Start with the filthy car. I got it with a blown motor and all the usual problems 240's have. Still, these are hard to find, even beat up like this. The paint isn't half bad but the car needs a new every suspension part and obviously a drivetrain.

Image

Image
Pulled the motor right away and pressure washed it.

Actually took everything out (seats carpet dash) and washed the insides also. I hate filthy cars, working on them in the dirt no thx.


Not sure how many pics I can post in each section so this is a test post.


Obviously I went with 5.3L because its extremely boost friendly, reliable, and affordable.
Image

Image

I do everything outside in the sun/moon without a lift and with basic hand tools. Not because I'm some kind of masochist; I'm just a poor stuent.
 
#2 ·
Before I get into much 'building' I will post some of the research/wiring related (show how things are done) hopefully it will be helpful to other swappists

Before buying parts, I made a bunch of swap budget comparisons. It looks like a reasonable budget would be around 20k with reliable parts.
Image

Having a converter means no clutch replacements or filthy dry crud slinging all over the place (did I mention I was a clean freak? I'd be pulling the trans every weekend to wipe out the bellhousing...)
Plus auto makes for a much faster car when done right.
So it looks like this will be a typical 'street/strip' car, a 4l80e is perfect for racing in a straight line with no parts failures at 'moderate' power output, and legendary 240sx IRS/handling might allow for some decent handling.

I did compare and contrast 5.7L/6-speed with the 5.3/4l80e/turbo swap,
The 6-speed, 5.7L aluminum engine drivetrain costs more, handles less power, and is more expensive to replace is there is ever a problem.
Its also 'stuck' under 500hp naturally aspirated for an economical street setup.

I decided that I would rather have the cheaper engine (4.8/5.3), cheaper transmission(4l80e), and an extra couple hundred HP instead.
As I could never afford to replace a six speed transmission (they are SO EXPENSIVE) or an aluminum 5.7L (those are NOT free)
and I am really rough on equipment, I am well known for finding every little flaw and bug. I like to test everything at every conceivable possibility.

Image

I feel almost as if Nissan intended this car to have a V8, but knew it couldn't be offered at 2800lbs with a V8 so they put a 4-cylinder instead and let us figure it out.
Another way to see this is, the modern LS V8 drivetrain weight is similar (or even less) than sr20det, and more balanced for the car.
Somebody weighed it out for us, turns out the 240sx is more balanced with an LS engine after all
https://ls1tech.com/forums/conversi...hybrids/1412014-ka24de-240sx-s14-vs-ls1-240sx-s14-weight-difference-inside.html


I went through Factory service manual and collected the info I would need into one picture
photoshop will make it easy for everyone to see all the information without having to post multiple pics. This cuts down on the # of pics through out the thread.
Image


Before I even had the engine I was wiring the harness up. This car has around 100 hours of wiring in it as of today and approx 20k miles already.
how2wire
Image

Image

Image

Image

Image

Image

Image

Image

Image

Image

wired up to fire up. Will it fit in the car though? i was skeptical.

Image

It fit perfectly though, like an OEM harness right onto the passenger floor board. I will probably mount the ECU under the dash after the A/C is done.

tested the ECU at home to make sure it worked, did the segment swap and 2-bar OS. Everything went smooth.
Image

There are some very helpful folks on the hptuners site that got me in the right direction
https://forum.hptuners.com/showthrea...or-OS-12216125

couple more wiring
For the alternator
Image


4l80e wiring and logic channels. Trying to make this thread both helpful and instructive, not just pretty pics of someone's stuff.
Image

Image


Image

the turbo I chose was the smallest unit Borg Warner offers that still supports around 85lb/min (800~horsepower)
It is known as "S364". This was the first turbo I ever purchased. I didn't even open the box it came in until the day it went on the car,
because I do not want the air attacking it and dusting it up. I will never expose the insides to atmospheric content without an air filter,
except for once or twice here and there just to look inside briefly or get a video of the wheel spinning or something like that.
The air we breath is filthy. High quality filtration is part of 'cleanliness' that exerts an aura of high performance.
 
#3 · (Edited)
transmisson

The 4l80e is a monster. I love making jokes about how heavy it is.
I carried it about 15 feet into the back yard and realized I would need an engine hoist to get it up onto the table I was using.
Image

-When I get out of my car, it waits for the other passenger to get out.
-The car looks lowered (its not lowered)
-When you try to shift 4l80e, it shifts you instead.


Inside the 4l80e was very cherry, it came from a 4.8L Van with ~101,000 miles.
Image

Image


post regarding 4l80e I came across that seemed worthy
https://ls1tech.com/forums/automatic-transmission/1885692-best-year-4l80.html#post19775736


DBW to DBC conversion chart (I made this because the schematic fooled me pretty good, its got both color harness connectors shown together on one plug)
Image


Couple more FSM pages that are useful
Image


Alright lets see the engine work!
First thing they all need is a good wash
Image


Cleans up pretty good for a start
Image


hit it with a wire wheel to shine it up and remove the rest of the crust. Just be gentle.
Image

Image


So now it was time to remove those annoying broken exhaust bolts
Image


A friend told me about the secret recipe (shhh)
Image


Well, after breaking extractors and dremeling them out and breaking more extractors... I was just /facepalm
The heads flew off
Image

Really happy I got to get under the heads and clean the engine up
Image
Thats more like it. I was also able to inspect crosshatch and lifters
Image

It looks good to me so far! Hit the image limit, on to the next post...
 
#4 · (Edited)
While waiting for the new heads to come in I found out how tight the balancer bolt was
Image


FSM procedure for MLS deck prep

Image


Clean up that OEM balancer
Image


I don't have an angle gauge... but I do have a plane of reference and a unit circle!

Image


Setup a timing pointer that I didn't need, and inspect deck flatness

Image


Heads came, New sweat to drown me in :rock:
Image


Looking back I think this was good preventative maintenance I should have done anyways.

Image


I've been around the internet... and heard too many stories about installing head gaskets backwards and coolant flying out of orifices not to stop and check...
Image


Use brand new head bolts... do et!!111:smt115
Image


"Dress up this rotten carcass, just to make it look alive" -NiN

Image


Well that was easy :p

Image
 
#5 · (Edited)
A very nice person on corvetteforum sent me a whole box of LS1 accessories.
I used F-body spacing this time around. Seems like theres tons of room for any space I want in the 240 though.


This is how you get the 5.3 to accept LS1 alternator bracket
Image


The PS line kit for 240 they sell in ebay was too long, simply cut it with a hack saw
Image


Speaking of cutting the sikky oil pan instructions require that I cut rear of the windage tray, I think this is for oil return reasons.
Image


Since I had the pan and tray off anyways, I looked around inside.

Image

Gen3 internals good to at least 600bhp, and I've seen them at 600rwhp so I think I can push my luck to 700bhp or so without issue.


Not sure if I did the engine any favors but I primed the oil galleys manually, it felt right

Image


I'd never seen an LS before this so all these different models were confusing, like L6 Lx LM LY LOL IT R ALL SAME V8 TO ME :smt072:axe:
Was the LS6 cover gasket the same as the truck cover?
Image


:smt115

I decided to use the truck cover after all. After inspection, I noticed the LS6 valley cover has a baffle but not a check valve, it was just an open hole in the back.

Yeah, like my engine needed another hole in the crankcase, in a hard to access location (at the rear).

Who does/want that?
Image


I swung by my friend's fab shop and he let use the tig to slap an oil drain on the sikky pan.

Image


I set the intake on to do wiring harness injector lead extensions.

Somehow I managed to reverse the two sides, I guess when I worked the harness to fit the car interior, every injector wire needed to be extended. I only noticed because I pay attn to every little detail, could you imagine the motor firing up with #1 injector wired to #2 and so forth? Yeah it would have run... like shit!

Image


Pan chillin on engine
Image
 
#6 · (Edited)
Cut the 4l80e 'ears' off they said
Image


After cleaning all the aluminum out of my ears

I fill the new converter with fluid and engage the most important part of the vehicle ever so gently into its new home.

Image


And it was time for a test fit. The 5.3/4l80e combo was so heavy I decided the best way would be to chain the hoist to the bees nest.
I started calling the ~40 year old boat 'bees nest' when a family of bees... well you get the picture
Image


The hoist is around 25 years old (maybe older) and barley works. I have to be careful not to get under it because at any minute it could break me in half. Its wasn't in the budget to replace so...
Luckily with no core support the engine only has to come chest high give or take.
Image

I simply push the car under the engine and lower bit by bit. Easiest job ever.
Image
It fits great! I love all the space in front and around the plugs.
The car was made for this swap

Next day I started making the trans mount. Everywhere I read says I would need to do major surgery to get this 4l80e to fit in there.
"nonsense" I said to myself, as I raised the tailshaft. "I'll make it fit with the stock crossmember watch"
And so I did.
Image

Or so I thought. After cutting some nicely shaped materials and firing up the 30+ year old arc welder (everything we have is super old and barely works)

Image

I was like yeah, that was easy...
Image

Reinforced OEM crossmember with some extensions on it looked to be a quality piece.
Image

I was looking at it and something was bothering me about it. Hmm what was it. What did I neglect...


Suddenly, I knew what it was
Image

@#*&@# I had forgotten about the pinion angle. This was my first trans cross member fabrication and I was only vaguely aware of such atrocities.

Sure enough it was wayyyy off.

The trans had to go up another... it felt like 10 feet.

Seriously though the tailshaft to move up at least 5 inches.

And of course... there was no way to do that because the factory cross member mounting... brackets? stubs? what do you call those things anyways. Well, whatever they were, they were in the way.

I cut them off the chassis faster than I can form coherent thought
Image

Image

Couple hours of hammering and cutting later, I had all the room i needed. And then some. I bet I made the record for most roomiest transmission tunnel 240sx chassis in the world.
Image

Quickly got to work making a whole new mount system. Thicker... stronger... less bolts... easy to access.

I am glad this happened the way it did.
And best of all, pinion angle was PERFECT. And if I sound surprised... I was. After all this was my first real trans mount ever, and the materials came from a scrap pile of leftover steel from bridge construction materials.
 
#7 ·
I took some time to file the burrs from support spot welds, and coated the bare metal with POR-15 to seal it up.
Image

Love that stuff.

Then I pulled the plugs, put a battery charger on it, and started looking for oil pressure on the trusty $12 mechanical gauge I purchases specifically for this one critical test

Image


30~ seconds later, no oil pressure. And nothing in the see-through lines either. No kidding...

Well, damn. I didn't want to take any chances, so,
Pulled the engine back out and ordered a new oil pump.

Pulled the pan and front cover
Image


looked inside the old oil pump
Image

And it looked fine!

Primed the new pump and installed it.

Chalked it up to preventative maintenance.
Image

My method for putting the pan on. And off. And on. And off...
and on.

Image

You gota use a new balancer bolt each time, too

Image


FWIW the motor did the same thing: no oil pressure for a good 30 seconds. Its just how they are after sitting I guess, and residual oil protects the motor while it waits.

After 40+ seconds it did finally show oil pressure.
Video of oil pressure results

Plenty of oil pressure primed up,
The motor was looking good, couple things left to do before the fire :smt025

Image

Image

Got the manifold on and ready to go, but first I wanted to pressure test the manifold/head
Image


A very simple, essential test that is often overlooked.
I made a video of this as well to help others with the overall idea


I will do it again from the compressor once the turbo is placed and plumbed.
A "Boost leak pressure test" is always done prior to running a forced induction motor. It is one of the three things I always demand before tuning an engine (other two are: compression and timing test)


Tentatively placed the core support back so I could find radiator hoses and finish some wiring to fire up.

Couple of runs (literally) to the auto store and I had everything I needed more or less.

Looped the trans lines for the moment because its not like I was going to drive it yet.
Image

I plugged in all the basics, lines runnin all over the place, just to get it started of course.

Loaded HPtuners on the laptop and used the scanner to add fuel until it started and ran. Pretty easy...
Image

I let it warm up, fans kicked on, everything seemed to work well. But the exhaust being so short bothered me a little so I shut it off and shoved some clothing into the manifolds to keep cold air from... you know... doing stuff to the valves. Or whatever. I'm just being super careful ok!

I put the car back up and started working on the shifter next.
I think of this as sort of an intermission.

The Engine running was a big step for me, hearing it just... well you know how it feels, I bet.
Image


Earlier in the week I had gone to U-pull-it and grabbed a bunch of different shifter related hardware because I wasn't sure what would work with the 4l80e.


After trial and error a bunch of different shifter strategies I found one that worked. I think this was the 4l60e bracket from a V6 Camaro...
Image

After slightly elongating the holes it bolted to the trans easily enough. And worked marvelously with the OEM Camaro shifter...
Image
I made a plate to cover the huge hole of course. And that was just the beginning of my insulation plans...

Image

My dream had come true- An OEM style shifter fit the car perfectly. Like it was made for it.
Image

I started laughing manically at some point over this.
My god this thing will be so easy to hide. :smt077 Even left like this you almost can't tell it wasn't made for the car.


#10 ·
As I get a chance between homeworks I can keep updating,
thanks for the kind words


next step: get exhaust plumbing so it will drive and finish the rest.

I knew better than to try to do all the hard wiring/clips/shields/routes/details/fuel/etc without first knowing where those hot exhaust tubes are going to be.

I had the car towed to a friend's house that does turbo exhaust plumbing. Hes got a few cars and I've tuned a couple of his 5.3L engines and really like the way his fabrication efforts look and holds up, the cars are fast and I stood on the plumbing. He offered to do mine when I suggested a V8 swap back before I started.
I was like hell yeah!
Image

We used OEM truck manifolds and a 220V mig welder.
Image


Image

The car shouldn't be allowed to make any noise from it's gate.
Furthermore I wanted the gate extremely easy to access.
Image

We went to U-pull-it and bought $40 of stainless exhaust tube which was more than enough. The 2.5" stainless came from volvos mostly and some of it was slight oval shape which I thought was cool, I used that close to the ground so the pipe is sort of flat on the bottom. I had always wanted to use oval pipe somewhere.

Image

Image

I spent a lot of time on the collector.
Extremely beefy with no sharp corners.

The top of the tube actually slides into the flange.
Image

Before wraps
Image

Image

Image


Here is driving it open downpipe, exh ends at bellhousing
 
#11 · (Edited)
I enjoy welding/cutting/cleaning the intercooler plumbing, I've made around 30 sets for various vehicles over the years. I like all the different ways you can make welds look using different torch/tungsten.

I don't own a tig welder so throught this build the only activity I won't be doing myself is the welding.

I wish I did have a tig of course and if you wanted something welded I would do it just because I enjoy the process of measuring, cutting, cleaning, welding something.
Image


My friend let me alone in his shop again to cut and clean everything.
Image

He has some really cool tools for doing these types of jobs.
Image

I love cleaning pipe spotless and positioning the clamps for easy access.

The car theme is speedy access.


I took the car for one last welding, a random muffler shop (I knew a good exhaust shop could bang out the tail-exh in a professional manner for cheap and I didn't want to bother my friends over this little piece, too easy)

I made a trade with them(a large muffler) to get a proper size muffler with extra resonator installed using my provided V-band clamp to extend the exhaust to the tailpipe.


Now it will look and sound like a regular car.
I love this picture down the back, with the exhaust hanging casually and the trans pan split.
Image


One of the things I love about quiet car is ability to listen for engine/transmission noises. This is why I always recommend a quiet exhaust system for every car, to listen carefully to the drivetrain, then you switch to noise mode later if necessary.
Immediately I heard some kind of clattering noise in neutral, that I couldn't hear before with loud exhaust.


I did some searching and there was no info about this specific noise.
Yank suggested it could be the flexplate. And every since i put synthetic oil in the engine the rear main had started leaking. (checklist: always change the rear main, got it) so I figured this was time to pull the trans and do some maintenance.
Image

First time opening the rear cover of an LS engine. Not the last.

Image

All cleaned up. And while I was in there I added much needed insulation.
Image

First time using rivnuts also
Image

Triple checked the converter pull out I was using

Image


Check fluid color in the daylight
Image


Put it back on the road and still had the same noise.

Immediately I somehow knew it was the pump in the transmission, and realized I should have changed it anyways as preventative maintenance. The pump is the 'heart' of the trans and if it fails, the entire trans/converter could be finished.
A friend let me use his lift to make it faster. He also had a transmission jack. I felt spoiled doing this in the air while standing up.
Image

New pump in. I 'rented' the pump tool from ebay (re-sold it).


Is it like a Regular car at idle?
 
#12 · (Edited)
Next I wanted to do the fuel system but there was still too much wiring to do first. Since I had to pull the dash anyways I used this chance to fix some of the major cracks you might have noticed.
Image

I took the next 25 hours or so devoted to re-wiring the chassis harness to relocate the fuse box to the rear.
Image

I use extra protection everywhere. Its usually wires under tape, inside hose, wrapped in a loom, or even two hoses, or some combination of those.
Image


Image

I kept the OEM wiring for everything(air bag, horn, wiper washer, fog lights) available in case I want to re-use it (fog light switch can be used to turn something else on for example), plus I added several wires as spares so I wouldn't need to pull it back out again if I wanted more wires.
Image


Image

Where the harness goes through places like this it gets a big plastic shield. I scavenge these plastic sheaths from junkyard cars so I got plenty.


For now I wrapped the fuse box in a breathable bubble of protection and stuffed it into the quarter panel (shown below without wrap). Its still wired like a factory harness, battery power comes through the OEM fusable links in the trunk where the battery is now. I kept it simple.
Image

Dash got huge upgrade.
Image

Image

Still not perfect but at least the huge ugly gashes are gone.
Image


In preparation for the new fuel system, I ran some new hardlines.
Image

Of course I used riv-nuts and OEM fuel line mount rubbers.
Image

Hard steel fuel line is ideal for daily driver applications.

Image

I ran the line on the side of the car away from the exhaust system.

I washed these out several times with brake cleaner then flared the ends using rental tool.


Even though the car still had the OEM fuel pump in the tank I was able to make 3~psi of boost reasonably on OEM injectors (to like 5500rpm) I drove it like that for quite a while and compiled this video of random pulls (mostly for audio enjoyment, I like listening to quiet car)
It was still on 3.9x differential so it spun easy, it wasn't very fast yet.
 
#13 · (Edited)
my car has a fuel infection
(I wrote this somewhere else but it was so well done I thought it fit here. )


Time to mate the newly installed fuel hardline with the new fuel system

The highest quality injectors I could find at a reasonable price turned out to be fuel injector clinic.
I got a great deal, bargained for a student discount on their cheapest injector, which was actually larger than their smallest injector.
Image

Naturally I placed the highest flowing of the set on cylinders #7 and #8, mostly superstition
Image

make sure you solder near open fuel lines for highest heart rate rush
Image

Remember to grease O-rings !
Image


So here is the pump I wound up with, another great deal I couldn't pass. Aeromotive stealth. 750hp forced induction capable they say.
Notice I only use high quality 'breeze' stainless hose clamps.
Image


This picture is to remind us which direction the fuel sock must face when the pump is installed into the vehicle!
Image


SO here is the original fuel lines/hat setup. The factory uses rubber hoses that wrap around the tank.
Image


lol I used both clamps on the fuel pump feed because hey, why not
Image


For the fuel pump wiring I decided not to use solder, it just seemed like a bad idea.
So I found these gasoline compatible crimp connectors, with some kinda 'vulcanizing' (heat shrinkable) ability.
Image


So above we saw the factory lines are simple rubber wrapping around the tank.
A friend gave me the S15 tank topper which uses opposite direction for fuel lines,
I ran some braided hose exactly the same way the rubber lines were done from the factory, but on the other side (away from exhaust).
I wrapped them in protective rubber/tubes just like wiring to keep them from contacting anything. Most of us know what happens when stainless hose vibrates on other objects (it ruins both the object and the hoses).

Notice I didn't use any AN fittings anywhere in my fuel system (Okay, I admit I have ONE and its a RUSSEL on the fuel rail)
Clamped braided hose like this is track legal, and it eliminates any chance of AN fittings coming loose or leaking fuel etc... the horrors of AN fittings and braided hose is mostly avoided.
Far more simple and easy to deal with this way.
Image


Image


For now, I set it up so that all the lines and regulator are easy to access. In the future I will put a 90* on the line and hide the filter etc...
but for now i Wanted it all very accessible for service just in case I wanted to change something.
You can also see the one AN fitting in the system, on the rail. It was necessary to mate the rail to the fuel line, there is really no other option there.
Image

After you do this sort of work, run the fuel system in a quiet place with no wind. That way you can smell fuel if there are any leaks.
I crawled all along the car, under and over, inside and out, smelling for gasoline which has a strong odour we are familiar with, while the fuel pump ran.
The Quiet helps listening for things that should not be making noise.

After the new injectors it was 1am~ but I still wanted to drive it real quick.
I plugged in the numbers and one the very first try/tune it was good enough to start and drive around with, and even go WOT for a test run.

Next thing I needed was a proper intake tube and PCV vent/draw for the crankcase, like OEM. I have copied the Toyota/Nissan turbocharged engine platform exactly. I will show the tube soon, after the shielding is started.
While I was at my friend Kiko's shop, I had the intake tube off and made this video for fun (I never get to see it spinning, I wanted to get a video I could watch over and over and over...)
 
#14 ·
Spark plugs
An essential for performance applications is easy plug access. I really like how inline 4 and 6 cylinder engine's plugs are so easy to get to. If I couldn't get the easy access I wanted... I wouldn't have done this swap.

Not that I check them much, or at all, haha :rolleyes:

It was about 7k miles that I had put in the new injectors/pump. I had been driving on unknown injectors (LS1 or something) and had put the plugs through hell, so to speak, what with all the tuning and fooling around with what is/was a new computer system. I made a post on HPtuners about it because its always nice to have other people with more experience check your $#!T out.
https://forum.hptuners.com/showthread.php?70543-Check-out-these-TR6-plugs-if-you-wish-7k-miles-5-3L

Here are the plugs with 7k
Image

They looked pretty good to me. A little anti-seizy but I think that's mostly from handling on the way out.
The plugs take about 30 minutes to change. Even so, I'm so lazy I never even checked them once. It has been a maintenance free monster. I can just tell from how it runs and sounds, plus I got a third eye on the wideband all the time too so it never stays rich and fouls them up. It knows better. Or maybe it has me trained to know better. Either way I spose is fine.

Luckily OEM manifolds support like, oh I don't know, around 800rwhp+ and have easy plug access. What more can you want from a V8 in a random chassis?

even with school pressing down... I still managed to get a bypass installed right after the compressor (The way it should be). Don't let anybody convince you to put a bypass after an intercooler :smt076


Image

It works F@#*(@# FANTASTIC, very tight and very responsive. I am very sensitive to the sounds of a compressor "in pain". Now I can finally start turning up the boost without damaging the poor turbo (it is one of the keys to maximize the lifespan of the turbo)


Suspension
Now that I was driving it so much, I figured it was time to get an alignment and put some decent suspension parts on the car, and some tires. I did the tie rods, struts, strut mounts, lower control arm bushings, ball joints, TC rods, probably some other stuff I forgot about. I'm not huge into suspension, I do not enjoy super low cars or ridiculous adjustable units for a daily driver, and none of that stuff will make it any faster on the street.

Pretty much everything in the front end needed to be changed, and it wasn't very expensive.

I used all OEM parts (I mean, KYB AGX I consider pretty much an OEM strut)
And of course I can't do everything myself- Thanks, Stephan, for aligning the car.
Image

That took a day.
Now it drives like a Cadillac.... Escalade :smt075(5.3 humor)

Rear End Fun

Unlike other cars :smt064
Nissan 240sx has incredible options for differentials and brakes that are extremely robust, affordable, and easy to install.

The entire differential setup was surprisingly easy to find.
Image

This is from a 90's (90-94 I think) Q45 (V8 car),

basically an indestructible, wheel stand capable, 32-spline axles, etc etc &c
Same differential as in the twin turbo 300ZX I believe (3800lbs car).


I had never seen one before, only vague impressions over the years from forums. And no, it didn't fit in the Corolla. I bought a cheap Corolla to pick this up (and other dirty work) and I had it hanging out the side of the car for a couple miles, in the rain.
It got the back of the Corolla so filthy I was afraid I would have to burn it. Gear oil plus 20 year old grease is a GREAT combo. for um :-fire

The right rear end ratio, right around 3.5:1 is just about perfect for 130-140mph trap speeds, 10 second quarter miles and tidbits of highway cruise economy, a sweet blend of everything in an easy to install and extremely reliable package.

A large benefit of Nissan lineages IRS appears to be this interchange of parts between similar vehicles, offering V8 quality differentials in cars originally equipped with 4-cylinders.


To get this thing to mate the driveshaft (The 4l80e-yolked Sikky piece) just drill the flange. Only takes a couple minutes.

I put driveshaft flange on to make the holes center.
Some made the mistake of removing that bolt in the center. You can't just bolt it back on that easy. To do that is complicated and unnecessary.

I prefer simple and easy. The non-abs extension differential was same length as the OEM unit.
Image

A shot inside the diff was difficult to take but worth it. I love how these things basically never wear out.
I used Amsoil's best synthetic gear oil in this thing to give it a fighting chance.
Image


Exhaust shot
I love how it came out, very straight and easy to remove, its just puurfect. Wireless cutout is amaaaazing
This my friend weppa shop btw. He let me use his lift for the differential.
Image

The diff made it much happier. A stock V8 wants a bit of load at 2500rpm, ya know? Poor thing couldn't get a grip...
Image

It's time for a little progress video
Cutout and Bypass valve


A new meaning for 'cheap paint'
I also experimented with paint on the exterior a little.
Okay, a lot.
I just want to paint all over the car like a kid I guess. Usually I pick a spot that has something to cover, like the bumper has a small spot where I backed the car into an engine.

I saw some really good looking stripes on a car from magazine so I attempted to capture just a little of that essence here.
I think it came out good considering its a washable, $1 paint from walmart and I did it in the dark.
Image

I feel it gives a personalized taste for no cost... how can that be wrong?
Image


I love organizing and cleaning up my engine bay. I really enjoy starting out with a huge mess and gradually hiding and stylizing every single object in sight. It takes a loooong time though because before I can pack something away I need to be sure its going to last a loooong time. That is why you see lots of extra length wires, bolts in hoses, stuff kinda meandering around with seemingly no purpose.
This is how I manage to drive and work on the car at the same time, the extra length and extra easy access of parts that are normally 'hidden' allow me to diagnose on the fly while still in the process of the build. Don't judge till I'm done pls kthx
A progress shot of the engine bay
Image

You might be wondering why all the colors, paint, etc...
couple reasons. One is, I am not sure what color I want things yet. What theme for the engine bay? I have a couple ideas but I needed to see some color on it first to help me decide. Another reason is... its basically free to paint with cheap paint which will also wash off with water if necessary, and I was bored (hard to imagine but yeah I get bored at night when I can't work on the car).
A third reason is, I was concerned about the temperature under the hood, and putting some paint with a very low tolerance to temp would help me see if anything was getting too hot. Basically the paint would run and I would notice that right away. It gets runny around 240-250*F I think. You'll see more about the temperature stuff in a minute.

I try the paint on lots of different parts. I noticed I could actually paint several things that normally wouldn't be very colorful... like the hoses for example.
Its just a start of course. Eventually I will pick a theme and basically paint (or powder coat) and shield/cover everything in the engine bay. At the same time the coverings will all be very easy to remove. I'll probably use some kind of snap-in-place parts like the new cars have for engine covers.
Image

Image


HPtuners small details
One of my favorite things about HPtuners (OEM ECU stuff) is all the options you get. For example, I've got one wire connects to a momentary switch which enables a secondary transmission map in the computer. This way, I have one map for normal driving, and one for... well, whatever.


The second map can change almost anything about the trans behavior, shift pressure (firmness), timing (delay), torque management, shift speed/rpm.
I found it extremely handy recently to keep from having to fool with the shifter. For example normally when driving the car goes from 1st to 2nd very early, even at 40-50% throttle position it will shift early to try and conserve fuel. I tuned the car this way on purpose... to conserve fuel of course.
however, sometimes you want to step on the gas lightly but not have the trans shift. Most people would pull the shift lever back to "1st gear" and then manually shift to 2nd, etc..
But I find that tedious, annoying, unnecessary. So instead, for now at least, I set my second map up so that it wouldn't shift so early from 1st or 2nd, that way instead of having to touch the shift lever and worry about shifting manually etc... I just smack (I'm rough with stuff to break it if its going to break) the button on my console and WHAM I have an ideal map for... rolling into 1st without having to worry about when to shift, hitting a limiter, or having it shift early, etc...
Image


Egg Yolk?

This is just a shot of the yolk spacing at the trans, a critical distance some would say.
Luckily I didn't need to cut the driveshaft or rebalance it... ever. I like to avoid that kind of thing because it would invite vibrations and trouble if not done properly. And right now the car glides smooth as glass at all speeds so NO WAY I was willing to cut anything that turns.
I simply took the Sikky driveshaft they provide for the 4l60e,
then had a professional place put on the correct yolk. It needed some kind of "counter boring" I think they drilled down the center some distance for the 4l80e.
And walaa... It just happened to be the perfect distance for me. Good news for those of you wondering about that sort of thing.
Image


Shielding video
Here is a video i made to help understand how I determine where needs shielding, more or less. Before I consider the airflow dynamic under the hood I simply take IR measurements first.

Most of it is doubled up, there are two pieces of shield with air space between them in most places as the most effective measure. I've done more since, this was just the first step and I banged out the video for comparison purposes.

I'll likely create another couple videos with this sort of progression, then figure out the final air path for the engine bay, buttoning up the undercarriage and putting water (lines/drips/heat exchangers/creative plumbing) wherever necessary.
 
#15 ·
Since I can't edit posts, check in newer posts for error corrections and added details

post#2 broken link
https://forum.hptuners.com/showthread.php?65609-4L80e-Segment-Swap-for-OS-12216125

Almost caught up.

Oil pressure switches be crazy
This was my first and only parts failure so far, and it was kind of funny. I came out to the car from class, and looked under it...
And saw a puddle of oil.
"UGH" I thought. Immediately my thoughts went to the rear main seal I had some recently "@#)(*# did the rear seal fail already?"
I didn't want to believe the seal had failed. I did that job so clean it would have truly shocked me.
I prayed it was the oil pressure switch and popped the hood and... it was!

Image

This thing never worked to begin with. Something was wrong with it... I guess this is why... it was full of oil and had finally 'popped'.
Luckily I was carrying a replacement fitting for the back of the engine. I have many spare parts like that I carry around while building the car so that when stuff like this happens I am prepared. It took 30 minutes to pull this thing out and re-route the oil line and get back on the road.

Image


some engine bay progress shots now that I am getting sorted.
Some of the events are out of order, for example the video of shielding happened before the alignment.
At some point I got a new camera so that is why the pictures suddenly start showing dates. The old one got brake cleaner on the plastic lens and its never been the same. I remember one time I tried to clean a plastic headlight with that stuff.

Hahahaha yeah that wasn't my car.
Image


whats an active build thread?

I usually skip mundane topics for brevity but for this car that includes stuff like brakes and brake lines, oil changes, cleaning days, minor wiring, small diagnostics, etc... Like the time I took off the door panels and greased the window regulators and put anti seize on the door locks
Image


Or that time I changed the alternator because I thought the old one was weak (it was fine) and made a little shield for it
Image


Or Like (yes I just used like) it should be obvious the car has S14 silvia style (300zx) brakes and dot approved stainless lines, because I would be crazy to try and go 130mph without amazing brakes, and silvia brakes (26-30mm Aluminum 4-piston caliper stuff with new rotors from rockauto yum) are really really easy to get and no trouble OEM parts. Everyone knows that... So to me this obvious stuff, I never did a section on it like brakes because to me that is trivial, obviously I used this option. I only mention it now because my job is to save everybody money and that is two major ways the 240sx saves you money: IRS diff and brakes are basically done if you only need a 3.5:1 ratio, pretty sure I've seen 7's or 8's on this hardware. Do your research though as this is my first one.


To further improve fuel economy I am looking for taller tires, And some lighter rotating parts. I hope to get the weight for all the internal 4l80e parts and see if there are some lightweight alternatives if I ever need to go into a trans I'll try to have them handy. Also Hopefully soon I will get a second, light Al driveshaft to try, lighter wheels (probably put OEM wheels on the rear just to test). It's already got the tightest, lowest stall Yank could make, in the most efficient 9.5" size lockup, and an SFI flexplate. Its already got the synthetic gear oil in the diff.
I got some new rear wheel bearings thinking of preventative maintenance, but the Stock wheels bearings are so good- I've never had one fail or make any noise in any 240sx. So I am loathe to just start changing wheel bearings for no reason, what a job right? IF it ain't broke...

Besides rotational kinetic energy and inertial investment reductions, I have/can remove much weight from the car still to further improve economy to hopefully where I want it (lets say for now that 28mpg at 65~mph would be NICE but I think maybe 26-27 is possible, 25 is definitely possible. I will discuss mileage at length somewhere else). There is a list of things (I'll show my real lists to give examples) that need to go I just have to finish so much other stuff first before I will feel like 'cleaning' or 'scraping' the chassis for tid bits and welding holes shut and throwing away the spare brackets lingering around the engine bay and using actual hardware to hold stuff. Because right now I know I will need some of those brackets when I add or strap things down with tasty hardware instead of zip ties. And I still want everything accessible within a fair reason.

In case you can't tell, I am obsessed with economy. I never drive the car easy though, so the obsession makes no sense. It might just be that I need to know everything is extremely efficient- and good economy is a great sign that everything is turning smoothly, very low energy is being wasted, plugs are clean, pcv is clean, no smoke or fumes, a tight ship. Like if a part vibrates around, that is a bunch of wasted energy. And everything vibrates, everything is elastic, it is one of our jobs to sort out what parts need additional damping and how to achieve that.

SR POWA
Its always been fun to get 33mpg highway and have 400rwhp with the 4-cylinder models in this car, pretty standard setup I am very familiar with,
heres one of my very first cookie cutter koukis

To beat that power/weight is entirely subjective. In my opinion, it needs at least 580rwhp to compensate for the drop to ~25mpg. That is kind of where this build is headed for a peak power setting while still maintaining high reliability. And there are subtle hints everywhere- the injector sheet for example, showing 580rwhp being possible with 85% duty cycle with a relatively low fuel pressure setting.
Don't get the wrong idea here. It isn't the engine's fault for 25mpg. With a six speed manual trans, my setup right now would probably easily touch 30mpg. The main fuel hog is that 4l80e monster. Its like running an additional 2 to 3 A/C compressors all the time behind the engine. That is why I want to find some lightweight internal parts for her. Or some rollerized parts. Just anything to make it turn easier.

Is the trade off worth it in terms of auto vs manual? Oh GOD yes. 10000% times I prefer the feeling of a finely tuned automatic over anything else. The correctly timed, effortless shifts dialed to the exact firmness is a sweet symphony while I manage to hold a drink cup (hands free) getting sideways slightly on the 1-2 like it was an accident. OOooops sorry the car just does that when it shifts hahaha. When I press the little button on the dash it does... and when I press it again its back to nice and firm with no crazy tire spins and a reduced redline with some torque management etc...
Its an extremely customizable experience and it is very consistent and reliable. And supposedly there is very little wear and tear- the trans is designed to pull like 7000lbs and could very well outlast the 3000lb car. Nevertheless they are affordable and easy to find so I am not going to baby it.


As the plot only thickens
more questions and longer lists

Speaking of lists, I promised to share mine, here is a fairly recent version
Image

And an older list

And a little rough sketch of temperatures around the engine bay
Image

Lists are important so we don't forget things. I simply cannot remember all these items day to day. Gradually they slip away.
SO it is very important that you write things down if you are like that too.

Of course there need to be new lists, new sketches, as improvements are made they will get cleaner until I have a fairly exact portrait of the engine bay conditions under as much load as I can provide (probably on a dyno getting back to back runs through all gears). That way the car will be reliable under the harshest conditions which it is unlikely to ever see in the field, either that or I will be aware of potential issues.

Some of last semesters homework/materials for fun


And because I like to end each post with a updated video or two if possible to keep it interesting

 
#16 ·
One of the things i did around the end of last year was connect the wideband to the HPtuners scanner, so I can log the a/f ratio while driving and go back to check it later. The way I've BEEN tuning is basically by driving the car and then trying to remember where it was lean or rich (I'm pretty good at that) but my lazy method is no match to actually logging the wideband accurately then reviewing the situation painstakingly for hours making minute changes to fine tune the engine.

Key word here is 'fine tune' and HPtuners 2-bar OS does not support real-time mapping which makes it difficult to remember where the engine was lean or rich 20 minutes later sitting inside at a table and then re-upload the map. On the other hand the result is often superior when using data-logging when instruments are logging how you think they are in specific frames. No sense wasting 10-15 hours reviewing logs and making changes if your just going to change injectors or something the next day or if the logs don't have data presented the way you need it.

So here is my original map I've been driving on for months and months "un-tuned". this is the first log more or less I took with the hptuners scanner. I tuned it this way be "feel".
It was fairly close but definitely needed fine tuning. I was being a bit too conservative with fuel, it wasn't knocking or anything but it definitely picked up a bunch of torque and response right through the mid-range with the extra fuel, it seems to run great between 12.6 to 13.0 approaching 0psi. The knock sensors do work and from time to time they did help me remove 3 to 5 degrees from some of the mid-load regions of the map where it had 25* or something and really needed more like 20*.
Image


Now here is it after a day or two of fine tuning, still not done but much more well tuned
Image


Here are the changes I made to the VE map in order to 'fine tune' the engine
Image


Now that is some fine tuning. Here is the VE map before and after as well:
Before:
Image


After fine tuning for ~1 day:
Image

And even more fine tuning later....
Image


In order to fine tune, or rather what kick started my fine tuning, was the addition of an IAT sensor and appropriate shielding for the intake tube:
Image

Yeah I've added a couple more shields. I will show more shielding once I get a little more of that done. Still lots to do, like that silly radiator tap for the steam port; it needs to be a welded fitting ideally. But I need to replace the radiator anyways because the orange water coming out of the truck engine is disgusting inside it. I've been flushing it monthly until it turns back to normal color, now that its clean I'll buy a new radiator and do the radiator shroud, hold-down/core support cover, clean up the plasma cuts, finalize radiator duct work and overflow container all at once, and hopefully move the trans cooler somewhere else (I'm thinkin near the rear of the car). It will be marvelous haha.

I can't wait to color that intake pipe by the way. The right way, probably real powder coat. But to do that I need to park the car for a couple days and I just can't bring myself to stop driving it...
Actually quite a few things need powder coated so I am just waiting to do all of them at once (need other things first though, like A/C)

Is it faster now that its 'analog wideband tuned'? Heck yes. I think it gained 20-30 horse and definitely gets up and goes quicker. The motor seems to enjoy air fuel in the 12.5's (much more torque) around -2psi and 0psi ranges.

What else can I say. Rock solid reliability I put thousands of miles on it since 2nd set of plugs. Still on my first set of plug wires.
I did a highway drive economy cruise at some point (just one so far) and get 22-23mpg with about 120lbs extra in the car luggage, mid-day Florida sun shining 70mph highway. It will do better in the future but for now this is pretty nice, almost back to what the stock KA24DE engine gets on the highway (25mpg with automatic)


Video time!


The first run:
Image

So about 7psi of boost after the shift, notice that even with only 2-3psi of boost spooling in first the tires are already near their limits. Part of that is because the high cylinder VE due to the stock camshaft still being in the motor. When I finally install a proper camshaft the cylinder VE will drop in those regions (2400-3400) and the head/valve will flow more allowing more boost to make less torque in the low-rpm ranges where I want to spool the turbo and not blow the tires off. The reason it rises so slow and gently is because I have a large gate 44mm and using the weakest 3psi spring. With a heavier spring it should come on much faster and harder but all I have is street tires so this weak onset is actually tire sparing.

Also notice I am only taking to 5500rpm and 11.6:1. It's barely getting a warm up and already quick as a night terror. Even with less power than traditional 5-speed 2.0L 240sx swaps, its still much faster from a dead stop because of the auto and incredible converter. I love 'power braking' holding fuel and brake together. One time I almost crashed an oldsmobile into a friend's garage doing that, the carb got stuck wide open. I slammed it into park and shut it off. I was like 15 years old :D


Most of my drives are 40minutes to 2 hours. I'd like to work on the A/C system next and enjoy it at 7-8psi for a while but I think the need for more power will over-rule the search for A/C parts. Actually I drive the car so much now most of my $$ goes to fuel so I haven't been able to buy so much as a hose for the car in the last few months. Just using it like a work truck I guess. Almost 20k miles since the swap and the original 22 year old starter still works, original intake manifold gaskets sealed up (reused) original exhaust manifold gaskets (reused) and around 11-12k on the fresh TR6's from whenever I changed them.

It starts easy and hasn't let me down yet. Which is kind of scary in a way (its due for something I just know it lol)


How much power does it have / has it had so far

One of my favorite things to do is... math! I've been a math tutor for around 6 years now and teaching it is a great way to remember.

For this example, lets do two things. first lets try the traditional formula approach:
cidxrpm/3456 = cfm * .069 = converted mass/time (lb/min)
For 5.3L
323cidx5500/3456 = 514cfm * .069 = 35.4/lb/min at 100% VE
But this engine has an OEM camshaft so lets drop the VE to 80%:
35.4 * .80 = 28lb/min or 280 horsepower

Now lets compare what the engine is rated at... Oh look its 280hp stock.

SO our math is probably very close, that is, the motor probably does about 80% VE at 5,500rpm with OEM valvetrain.


So there you go. At 14.5psi (sea level) with the stock cam we got 280hp. If I add another half an atmosphere to it of similar temperature air, that would be 7psi of boost or 1.5 Pressure Ratio:
28lb/min * 1.5 = 42.5lb/min or 420 horsepower at 7psi of boost pressure. Wow that seems like a lot. Anyways lets now check at the tires, assume 17% drivetrain losses:
42.5 * .83 = 35.5lb/min or 350rwhp.

I feel like that is about right, just a little high for how I have it tuned. I bet I am sitting on 330rwhp right now with 20hp on the table to 'tune' into it with a bit more timing (couple degrees I guess).

Now lets see what it will do with a cam at 7psi of boost though:
323cidx5500/3456 = 514cfm * .069 = 35.4lb/min * 1.5 = 53.2lb/min * .83 = 44lb/min or 440rwhp! So a cam is worth around 100hp or more to the tires, the more boost the more its worth, believe it.

And now the 15psi run, with a cam:
514cfm * .069 * 2 * .83 = 58.8 or 580rwhp
Note that I am taking engine flow rated at 5500rpm Even though it will likely spin 6300~. Consider the additional flow rate due to rpm as part of the error in this calculation due to any loss of VE in the stock head.


In reality it will probably take more like 18 to 20psi to hit that number, for various reasons (the turbo is a bit 'small' for that flow rate, the trans is probably a bit more parasitic than I am giving it credit for, the intercooler might be a tad undersized for such a high flow rate, the water injection will absorb some of the power, the exhaust downpipe isn't perfectly free-flowing, basically a bunch of little things will come together at that level) however I intend to dramatically raise the octane using methanol so 20psi of boost is no issue for top speed runs (track and dyno) and won't even be necessary for the daily driver setting.


Just a stock 240
Image

 
#17 ·
I just had a mid-term so theres a bit of free time to do couple more sections.


I Should probably add a links and time frame post for this LS swap


Timelime <!>
I sort of always consider today (even now) as a 49% waypoint, the vehicle drives well and I think I have the basics covered: pinion/trans stuff is silent and smooth, overall wiring schematic and function of devices proper, trans/engine are good, no oil/water leaks, no strange noises, turbo doesn't smoke (good drain), no exhaust leaks, no overheating, verified every cylinder fires and contributes evenly by disabling 1 injector at a time while driving, car pushes fairly well (no dragging), drives as many miles with no issue. I still have alot of that list to deal with so check on that thing for hopefully near future changes.


1-23-17 I went to the junkyard to scope out some LSx engines. Just looked at them, I had never seen one in person before, I mean never really LOOKED at one and tried to remember things about it. I made a thread on an LS specific site asking questions about what I saw. It was epic and I got banned. the admin was being a jealous jerk at my beautiful word use, it was just a haiku.
https://ls1tech.com/forums/generati...n-iii-external-engine/1858105-went-junkyard-scope-out-my-first-lsx-details.html

2-2-17 I went back to the junkyard and pulled a wiring harness from a 5.3L Tahoe motor, and took the 411 PCM, took it home and started the wiring (following LT1swap.com)
If you want a more detailed build thread, you may see the more wordy version:
http://www.freshalloy.com/showthrea...p/177129-Final-Build-LSx-4l80e-Turbo-Nissan-240sx-quot-What-was-I-thinking-quot

2-15-17 I received my first LSx 5.3L Engine from Ebay, and it was rusty and had low compression on two cylinders (bad head gasket). I got a full refund but it set me back.
2-21-17 I got a second engine from a local junkyard. It too had low compression on multiple cylinders. I didn't realize it at the time but that engine was probably fine to use, and just needed some cleaning and gaskets. Being inexperienced with LSx engines, however, I sent it back for another.
2-21-17 I removed the core support from the 240sx by removing the spot welds, took about 2 hours. De-bur the holes, sand, clean, and painted it. I used POR-15 on the chassis.
2-22-17 I received a 4l80e with 100k miles, took the pan off and it looked very good inside, red cherry fluid and minimal clutch material.
2-23-17 I received a third LSx engine and had even worse compression and a broken piston in this one.
2-24-17 I drove to homestead to check out the remaining LSx engines in the junkyard by myself. I brought a starter, battery, and compression tester with me, and walked throughout the junkyard and compression tested about 8 different engines they had. I wound up keeping the best one I could find, which had ~170 across the board. "Its a lost art" he told me as I left.
3-4-17 I pulled the heads from the engine I had selected. I bought re-freshed heads with new seals and a valve job, and exchanged my old ones in as cores.
3-11-17 The new heads arrived and I put them on the engine with new gaskets, following FSM procedure. Spent alot of time cleaning the pistons and chasing threads.
3-12-17 Installed F-body accessories, drilled and tapped the block for alternator, new balancer bolt, spent alot of time cleaning and chasing threads again.
3-12-17 Also Cut the "ears" off the 4l80e and installed knock sensors, valley cover.
3-17-17 Installed Sikky Oil pan, and booted the 411 PCM at home on the floor to connect with HPtuners, unlock it and do the 4l80e segment swap, and go 2-bar.
3-18-17 I put the engine into the 240sx and started making trans mounts
3-20/21-17 Made the first set of trans mounts to fit the 4l80e without cutting or banging the tunnel at all. This was a huge mistake because I found out a couple days later that there is such a thing as "pinion angle" and my home-made mounts put the trans at far too much downward slope. The trans needed to raise ALOT so I did all that work for nothing.
3-24/25-17 Pulled the engine back out, and modded the trans tunnel heavily. I will provide more details elsewhere. For now, just know I cut out the OEM crossmember mounting locations, and hammered it up a little too much (Over kill). But the reward was worth it: the trans fit with the proper pinion angle. Had to make completely new crossmember and mounting locations, though.
3-26-17 I spent some time cleaning; washing, scrubbing the front of the car, and added the POR-15 to the areas hidden by the core support.
4-6/7-17 Pulled the engine back out because I thought the oil pump was bad. I pulled off the front cover, oil pan, and installed a new melling OEM oil pump. Turns out, the oil pump was probably fine. Better safe than sorry, though.
4-10-17 Started it for the first time. It fired up and ran great even though I just guessed the initial injector settings and had no clue what the fuel pressure was.
4-16-17 Sikky sway bar and trans oil lines install. In case you are curious, I leave the torque converter unbolted from the flexplate until I am sure everything else is ready and the engine wont have to come back out.
4-18-17 my birthday. I installed the Camaro shifter into the 240sx and put fluid in the trans finally, and made the car drive a short distance. So far, so good!
4-28-17 I finally was able to get the car trailored to my friends house, where we started welding up the turbo manifolds (he has a mig welder). I saw his personal LSx turbo manifolds and I wanted mine the exact same way! We woekred on it about 3 hours every day from 5pm to sunset, missing a couple days on the weekend.
5-10-17 we finished the welding of the manifolds, overall it took about 24 hours total. I painted and wrapped them the best I could (my first time using wrap, I got very itchy) DEI titanium.
5-18-17 Just about ready to put everything on the car and start it / drive it away.
5-19-17 Welded in the wideband, installed the downpipe, finalized all bolt torque, used anti-seize on everything, and drove the car for the first time like a normal car. Err truck.
5-20-2017 have 26 minutes of driving on the car
5-23-17 Have about 100 miles on it and continue to finalize items on the enormous list I have

4-6-18 new injectors, aeromotive stealth, aeromotive regulator, fuel lines, fuel filter
4-28-18 7,000 miles, new plugs TR6 installed
https://forum.hptuners.com/showthread.php?70543-Check-out-these-TR6-plugs-if-you-wish-7k-miles-5-3L
6-28-18 3.5:1 differential installed
8-13-18 new alternator AC delco (now it feels like a regular daily driver lol)


As I finish each, I Will be able to show finishing of the multitude of minor details, such as battery relocation, battery tray reconstruction, fuel line relocation, radiator final placement, A/C condenser placement, final transmission cooler resting place, fuse box relocation, fuse panel changes, heat shield additions, fire sleeve/reflective surfaces, anything I think is worth documenting for maintenance or record. I keep different kinds of records on different sites. In other threads I have more about what I was thinking. So this build is really just getting started. It has many miles to go before finished. Its just not a corpse 'being built' as I am actively driving it.

quick breakdown comments;
I bought the transmission like Feb
Image

from ebay then, and by 5-23-17 had 100 miles on it with an open downpipe, drivin around like a beat up work truck. So this is easily a six month swap, and you can skip all the fab work I had to do if use a Naturally aspirated kit. Compared to an SR swap which is 1-day swap. 1-day is too easy, I want to DO something to the car not just install a perfect engine and be done (is it crazy that I think its boring to drive a regular new car? perish the thought):-~hang
The only reason I was able to produce turbo is because I was able to get the fab work done quickly (I don't wait to do things), and I know I shouldn't depend on luck all the time to get good parts and just hope everything fits by pure luck, and that it will last forever if I just keep cleaning it. I was willing to work with the risk and assume I could conquer any obstacle with sheer perseverance, and that simply isn't always reality. There was one expensive bad part so far- the trans pump,
Image

which cost almost as much as a next transmission, that definitely had been over looked in the budget but oh well.


Also error in an above post, somewhere I say "besides... inertial investments" I meant to say "besides rotating inertial investments".


Links <!>
I spent a couple years gathering information before jumping into this swap head first. I wasn't sure I would ever get the chance to do one but it just happened to work out.

Here is saved info in no particular order

Phil quote turbo pipe:
Its my belief that the pipes should be merged before the turbo and you should have at least 3" of straight pipe before it goes into the turbo. If space doesn't allow than you do the best you can do. You don't want hard turns right before the turbo.
-https://ls1tech.com/forums/forced-induction/1619207-out-curiousity-why-does-everyone-use-2-5-crossover-pipe-17.html#post17995746


Block the heater hoses, dont loop
http://www.pirate4x4.com/tech/billavista/Cooling/#LSCoolingSystems

coils dwell
"The dwell time at low rpm is what hurts the coils. Some coils (the round ones) will fire over 5ms by themselves hurting engines. I have ran the truck coils at 7ms above 5000rpm with good results."
https://www.yellowbullet.com/forum/showpost.php?p=11283338&postcount=81


engine building?
http://www.performanceboats.com/gn7-dyno/247545-some-technical-help-you-guys-building-engine.html

Alternator failure and replacement from a truck
http://ls1tech.com/forums/generatio...generation-iii-external-engine/1287967-fix-my-endless-alternator-failure-s.html

LS to KA weight comparison
https://ls1tech.com/forums/conversi...hybrids/1412014-ka24de-240sx-s14-vs-ls1-240sx-s14-weight-difference-inside.html

starter breaks block
http://ls1tech.com/forums/general-maintenance-repairs/1259228-starter-motor-mount-block-broke.html


Oil Barbell
http://ls1tech.com/forums/generatio...gine/1850804-if-you-haven-t-tought-much-about-oil-galley-barbell-check-out.html

grease the idler pulley
http://ls1tech.com/forums/general-m...s/general-maintenance-repairs/543273-wanna-maybe-save-80-ls1-idler-pulleys.html

Cam oil retainer ring pressure leak spot
http://ls1tech.com/forums/generatio...i-internal-engine/1814399-replace-old-cam-retainer-plates-prevent-yourself.html

fix steam ports
http://ls1tech.com/forums/generatio...ums/generation-iii-external-engine/1828994-new-steam-lines-hose-fittings-2.html

low cost steam port solution:
http://ls1tech.com/forums/generatio...v-internal-engine/1785743-erl-427-superdeck-build-all-motor-3.html#post18968703

the Al. 5.3 is where its at:
http://ls1tech.com/forums/forced-induction/1831597-daily-driven-boosted-5-3-a-2.html

use Thread sealer for rocker bolts on ported heads:
http://ls1tech.com/forums/generatio...eneration-iii-internal-engine/1840811-oil-usage-ah-hah-moment.html#post19354813

use a torque plate, heat the block, art method?
http://ls1tech.com/forums/generation-iii-internal-engine/1841690-5-3-head-studs-2.html#post19357911

About torque plate, NOT honing, etc
https://www.thirdgen.org/forums/tech-general-engine/758242-rebuild-time.html#post6272953


Oil pump swap writeup
http://www.ls1howto.com/index.php?article=4

Quick Squish post
http://ls1tech.com/forums/generatio...s/generation-iii-internal-engine/1841951-head-gasket-question.html#post19357948

more misc:http://ls1tech.com/forums/generatio...ternal-engine/1829409-cam-upgrade-your-thoughts-my-parts-list.html#post19235581

LS1 and LS2 lifter trays
http://ls1tech.com/forums/generatio...-iii-internal-engine/1841842-avoid-new-style-ls2-lifter-trays.html#post19357201


timing chain thingy
http://www.summitracing.com/parts/tfs-30675600
from thread: http://ls1tech.com/forums/generation-iii-internal-engine/1833787-ls2-timing-chain-oil-pump-seal.html


Road race oil control thread
http://ls1tech.com/forums/generatio...ii-internal-engine/1835513-ls6-reliability-power-mods-road-course-race-car.html

Pullout prices
http://ls1tech.com/forums/texas-members/1843138-fair-price-complete-pullouts.html

--------------------
"I hear ya! Had more trouble with machining BS trying to use aftermarket parts than I care to admit. Wish I would have stuck to factory short blocks as well. Tired of pulling apart "built" motors when guys are making twice the power on factory original stuff and racing the whole season."
http://ls1tech.com/forums/forced-in...ction/1550491-boosted-5-3s-what-rwhp-yall-making-what-setup-2.html#post19525070
--------------------

http://ls1tech.com/forums/automatic-transmission/1831188-4l80e-line-pressure-rise-rate.html

LS1 vs LS2 small thread
http://ls1tech.com/forums/generatio...eneration-iv-internal-engine/1832574-swapping-out-ls1-ls2-parts-difference.html

O-ring is very important
http://ls1tech.com/forums/generatio...eration-iii-internal-engine/1837613-internal-motor-inspection-results-pics.html

Chain rollers, PREVENT THIS
http://ls1tech.com/forums/generatio...ernal-engine/1846196-help-identifying-what-piece-i-drained-out-my-ls6-pics.html

Rear mounts WORK
http://ls1tech.com/forums/forced-induction/1846381-proof-rear-mount-turbos-don-t-work.html

Wet sump oil falling RPM post
http://ls1tech.com/forums/forced-induction/1846946-bearing-clearance-boosted-build.html#post19413247

Even crate engines fail, use an oem block
http://ls1tech.com/forums/generatio...s/generation-iv-internal-engine/1847543-low-oil-pressure-17-mile-crate-ls3.html

weird ringland thread
http://ls1tech.com/forums/generatio...neration-iii-internal-engine/930664-broken-cracked-ringlands-stock-pistons.html

HP tuner thread
http://ls1tech.com/forums/forced-induction/1761872-hptuners-boost.html


good MEthanol thread with some calcs
http://ls1tech.com/forums/forced-induction/1853711-water-meth-spray-ring-compressor-outlet.html

Oil Accumulator post, followed by more goodness
http://ls1tech.com/forums/forced-induction/1821089-twin-turbo-ls-boat-engine-8.html#post19350850


reliability bottom end list
https://www.ls1gto.com/forums/showthread.php?t=401429

another bottom end reliability
www.corvetteforum.com/forums/c6-forced-induction-nitrous/3365021-forced-induction-engine-reliability-list.html

Low mileage engines fail too, more reason to always use a cheap engine
https://www.corvetteforum.com/forum...com/forums/c6-corvette-zr1-and-z06/4220127-low-mile-c6-z06-engine-blown-up.html


Don't rebuild that engine!
https://www.yellowbullet.com/forum/showthread.php?t=2401762


"stock is reliable on the track"
https://www.corvetteforum.com/forums/showpost.php?p=1598526132&postcount=63

Engine building (machine shop/paying for work instead of doing it yourself) screws you over most of the time
https://www.yellowbullet.com/forum/showthread.php?t=2527749&page=8

-----

PS pressure reducing shim kit:
http://www.borgeson.com/xcart/catal...m/xcart/catalog/GM_P_S_Pump_Pressure_Reducing_Shim_Kit-orderby_0-p-1-c-133.html
"the stock LS1 throttle cable bracket, it works great with the S14 throttle cable just by simply flipping the LS1 bracket upside down! "

240sx LS swap example forum
https://grassrootsmotorsports.com/f...rts.com/forum/build-projects-and-project-cars/1997-nissan-240sx-v8/75101/page3/

Common turbo items
http://ls1tech.com/forums/forced-in...nduction/1621310-denmah-s-commonly-bought-turbo-car-items-update-7-11-16-a.html

BOLT SIZES FOR stuff LS motors
http://ls1tech.com/forums/conversio...hybrids/1050104-where-find-out-what-bolt-sizes-where-buy-them.html#post14902403

-----------------------------------------
To swap from Truck intake to LS6:
ls6 intake
ls1/ls6 intake bolts (can't use the truck ones, they are too short)
97/98 vette fuel rail (for 99 to 03 trucks) or 98 to 02 f body fuel rail (04 & up)
ls1/ls6 style injectors (i chose 28.8#'s b/c i needed bigger ones already)
ls1/ls6 injector pigtails summit part no. MSD-2400
ls1/ls6 water pump
ls1/ls6 map sensor
custom idler pulley relocation bracket
LS6 Valley cover?
-----------------------------------------

Use Anti Seize on the V-band threads!!
"Do coat the inside of the retainers with dry film lubricant to reduce friction between the coupling and the flanges."
Use a flexible exhaust piece between crossover joint!!!

"The trick we have learned from experience is to tap hard on the clamp with a mallet as you are tightening, you will vibrate the two ends flush together and when you go back to tighten the nut again, you will feel it has gotten loose."


"Most of the guys in the 240 uses are R4 LS0278 bracket if they are doing a/c."


" an easy way to tell if a motor is a gen3 but with the good internals, it will have the rear cam read, on the back of the "lifter valley" and have 13mm header bolts, and 13mm lifter valley bolts. They installed the larger head bolts at the same time they did the Internals, this has proved true in our experience so far."


"Buy the LQ9 out of an Escalade and a 2wd 4L80E out of a 2500 pickup."

Of course if you are standing in-front of a vehicle, you can look at the VIN#. 8th digit is the Engine, 10th digit is the year. T = 5.3L LM7, V= 4.8L LR4, Z = 5.3L L59 Flex Fuel (1999 to 2007) Typically 1999 to 2002 were cable driven throttle bodies, however, some did get drive by wire as early as 2000 I have seen.


2001+ Used MLS (multi layer steel) head gaskets. This can be identified by looking for a small brass rivet in the head gasket at each end of cylinder head where head meets block. Rivet = MLS


a couple other links I made
Guide for buying 240sx (this is on a couple Nissan forums)
http://www.freshalloy.com/showthread.php/176449-Kingtal0n-s-Unofficial-guide-to-buying-a-240sx

A Previous 240sx 'build'
http://www.freshalloy.com/showthrea.../showthread.php/176395-Kingtal0n-s-S14-Kouki-sr20det-Project-Repair-and-Restore


And for fun video my first stand-alone in 2001
 
#18 ·
Wow it has been a minute. I didn't want to come back here without some kinda dyno results. First lets take a look at some of the things I've done since last updated.

Updates!
Finals are over! again... :rock:
finished with all exams, I was out the door moving 15mph for half a mile, then I jump in and as usual she fires up instantly as if impatient to get going.
Exterior pictures are so rare in this thread :D
Image


Been doing a bunch of stuff to her! Lets start with the gas cover that I always forget to clean
Image

Every car I ever owned always has a filthy inside gas cover. And I always forget to clean it out after I see it.
So this was nice to do. I know its not much but it looks so awesome all clean!

Next I started working on the interior. The interior of 240sx is the easiest part so I typically do these things LAST.
Still, it really needed a proper shifter handle. I had visions of curbing the car and putting my eye out on that stick.
So...
Image

I found that handle in the junkyard from IDK what. I just looked around till I saw what I wanted and it happened to fit perfectly, it even uses the OEM snap clip.
No clue what its out of, just grabbed it and prayed it would fit. I was really worried because the 'normal' handle is a charcoal bricket lookin thing from a Camaro (UGLY) and well... it wasn't part of my dream.

Next I finished up the wiring on the passenger side. Or at least tidy'd it up a bunch.
Image


As much as I drive the car everywhere, people are asking me for a ride. They put a full tank of fuel in my car just go for a 20 minute ride with me sometimes, I've gotten around 5 free full tanks of fuel just giving rides.
Image

I used OEM relay/fuse junction boxes from Toyota and Saab because they are reliable, self-contained (water tight), easy to hide and service.
The fuses are all accessible and easy to get to this way. Also its important to keep electronics out of the sun, so this was an ideal spot for the boost controller as well.
Image

Now Its all tidy and hidden for the most part, and still very easy to get to. I'll leave it like this till finished with the A/C and then do one final "hiding" where I'll probably put the computer 'away' somewhere. But it can also stay like this indefinitely also.
Image

starting to look like a regular interior again....
At least now passengers don't ask me if the car is going to electrocute them anymore lol.

Next, some more cooling mods. I love cooling the car down more and more...
Image

That is a water cooled wastegate. Connecting water there dropped the gate temperature from mid 300*F~ to the temp of water, 180*F.
Image

Also between the shield and water in the gate, my running compressor cover temperature dropped from 350*F to 180*F also.

Heres a shot of the 'heat tunnel'
Heat control is an essential aspect of performance. Keeping the exhaust plumbing isolated and insulated is ideal.
Image

Allowing the heat to escape into the engine bay is not acceptable in any performance application (except maybe a low power, snow/blizzard storm mobile where you need to heat a can of beans using exhaust heat or something).

Next, more wiring...

In the trunk I have a special SAAB relay container.

Image


Special because it was the only fully intact relay/fuse box in the junkyard which included a 60 amp fuse and relay.

PERFECT for the fuel pump! So now, this is my dedicated fuel pump relay. It takes power from the battery (15" away) and feeds it directly to the fuel pump (15" away) for the ultimate combination of high current sustainability and safety. I've melted enough 40amp relays to know not to trust one here, or for any electric fans. And being that it is sealed up within an OEM water proof container is priceless to me.


Also a bit off topic, but still somewhat relevant (tuning theory in general) I tuned my friends S15 Silvia over one weekend,

Image

Image

Image


Can you believe 2.0L did that? Turbo tech has gotten really good. It was running out of fuel so I turned it down a hair to get the a/f into the 11's. Its running 93 with 50/50 methanol and around 27psi of boost. I tuned it a couple years ago on plain pump with 18psi and he put who knows how many hard miles on it from that point (uses it for roll races and car shows).

Can only post 20 pics per post so moving on to the next post...
 
#19 ·
Onwards

I usually don't take many exterior pics
Image


The chassis is decent
Image

Image

Image

Image

Image


I spent a little time (years) trying to decide which camshaft would be ideal.
Before I even owned an LS engine I was considering which cam I might want. (just kidding?)

Years later, looking at three different versions of the same thing,
mostly narrowed down between these two
Image

Image


I decided on the 1838, and there was a great deal on ebay for $224...
Image

but they were completely sold out by the time I had made my decision.

There was a great deal on the 1839 still though,
Image


It said "ONE LEFT" And I almost bought it. But I hesitated and someone else got it.
I emailed who I am pretty sure was Elgin, and they said something like yeah, we will make more eventually...

I told myself it was fate, I was not destined to have a cam from Elgin, I was too late to the party.
The last person on the planet to go looking for budget LS camshaft upgrade apparently

So...
Image


Picked up the TrickFlow grind!
Image

It's the 1838 but trickflow's version, which like I said, I am hoping contains "secret slow lobe profile magic" that only TFS can provide (there are no clips I could find of the Jeg's version).

I listened to a couple idle clips at 5.7L and was confident this was an ideal stick for my purposes, and it will work well at 4.8L also
This cam uses the slowest ramps of any camshaft I could find for the LS engine, combined with low lift and long duration. The advertised of the 1838 is actually longer than the 1839, which should tell you something about how laid back this grind really is.
Which will promote several attributes:

1. Low lift and light spring pressure minimizes wear and tear on lifters and rocker arms
2. long duration, properly timed events allow the engine to breath using forced induction quite well
3. With PAC1218 springs the valvetrain components could last over 100,000 miles
4. slow ramps emphasize smooth valve control at 'high' (6500~) rpm without beating up the valvetrain
5. As 'small' of a cam as it is, still lopes well at idle (good tone) which was important to me in a daily, perhaps more than the power it has to sound nice.


Essentially I am hoping to avoid rocker & lifter failure while still using OEM parts in a daily driver application by using a very low lift and light spring force as possible, and trying to extend valvetrain maintenance beyond 100k miles.

Whether or not this turns out to be the case remains to be seen.

With the sr20det you can put in a factory engine and drive it for a while then do a little upgrade. Cams are "bolt ons" 100rwhp or more with the right turbo... and nothing can possibly go wrong if you follow FSM and do everything right.

Apparently with the LS platform, this is not always the case. I will show how you can do everything properly/service manual procedure and still have a major #%@ consequences with something simple as a cam swap.

As usual I prepped everything in typical fashion, all ingredients, research, numbers, list ready to go.
Image


Started ripping into the car immediately and grabbed the camera
Image


Cam swap in an sr20 is like 3 hours.

 
#21 ·
I expected this to take all day, perhaps 10 hours, but I didn't think anything of it.
Should just fly through it like always right? This was my first LS cam swap but like the 100th cam swap I've done in my life, no surprises... I thought
Image

dowels went in, looks like it took 5hours to change all the valve springs and remove the original cam.
+5hours (spring swap & remove old camshaft)
Image


Old cam came out looking very good
Image

Put some oil on the new cam as it goes in! Do it!
Image

V8 camshaft fits!... barely. had to take out that bottom bolt from the core support, and radiator.
Image

This gasket is infamous for causing oil pressure issues.

In the future before using an LS engines I will always change the cam, springs, and this gasket, at minimum! I'll never use a stock cam V8 again.
Also yes I did briefly look at my cam bearings! I know the rule, but couldn't resist. :D
Image

Luckily none of the hot turbo pipes needed to be touched to do the cam swap!
Looks like it took 1.5 hours to put the new cam in, oiled, and re-seal the front cover
+1.5hours (install new cam & front cover)
= 6.5 hours so far

At this point I was pretty happy. Less than 8 hours to cam swap seemed ideal

I started putting on the rocker arms and was ready to button up the valve covers and throw the radiator back in when...

tradjedy tragedy? this happened
Image

A rocker thread pulled out of one of the 862 heads. A @#)(*($ rocker arm thread!
Should I bother mentioning that I heli-coiled it just out of curiosity, and it worked. But as I continued to bolt down the rest of the rockers on that same head, ANOTHER rocker thread failed and pulled out? And that when I helicoiled that thread, the first heli-coil burst out and shattered the rocker pedestal?

My plan was to finish this cam swap and drive the car immediately 250miles to Orlando to see Family there for a month before school starts. It should have been reliable to do that with, I had faith in it.
However now it looks like the head needs to come off. I decided to just leave it for the time being while I did some research. I took a Corolla (98') for a few weeks while I figured out what to do, and I am really starting to enjoy this little car. Its light, 5-speed, and 33mpg. Tires are $32/each for it. wtf...

Anyways. In my research I found others who have had this happened, and there is some mention of 862 heads.
I re-checked all my work and found no mistakes. I even have a video of the spring-change to that rocker thread by pure coincidence and you can even hear me in the video comment on that exact thread about "wouldn't it be funny if a rocker thread gets damaged"

What I think damaged the rocker thread was that spring compressor tool I used, and I believe the 862 head may simply have weak/poor quality rocker threads to begin with, I don't know[/size]
recital:
-I will never again use that type of spring compressor tool which engages rocker threads
-I will try to acquire superior quality heads from recommended manufacturers (for example, AFR) to avoid casting or insert/thread quality issues that some factory heads may have
-I will use the tool which compresses the spring against the valve while the head is off the car to install springs if using factory quality castings

A month goes by and I make my decision how to deal with this new problem. I am still budget minded and spending a dime isn't possible... I can't buy parts to fix this, in the spirit of budget daily driver. Luckily I just happened to put aside a single 862 head for this type of occurrence/emergency. Not knowing what to expect I always tell people to keep a spare engine handy for things like this and wow lucky.

So I came back to the car and removed the bad head
Image

pulling apart the hot side took about an hour
Image

V-bands were very helpful here
Image

About two hours and the head was off.

So that saved me. I took the spare head, and removed everything valves/springs/retainers/locks and transferred my good springs/valves/etc over to it.
After a serious cleaning (two solid days of cleaning gooey carbon goop out of the intake ports mostly) the whole place smelled of brake cleaner for hours, it looked as good as the original or better.
Image

Image

Image


Once it was totally 'dried' I did hit it with WD40 to keep it from rusting quickly
Image


slotted a head bolt to use as a 'thread chaser'
Image

didn't cut it very deep (crappy dull hack saw) but it still worked
Image


when I say budget
The only thing this entire build assumes is that engines and engine parts are basically free, I set strict boundaries on conditions when legitimately trying to represent a 'budget' build for the sake of accuracy when detailing my experiences but it won't matter how many engines ultimately fail unless they start to impede normal driving behavior.

This way, it doesn't matter if you are a millionaire or not, you can still get an LM7 and replace the heads or whatever and be driving instantly on 87 cheap gas (the car functions as reliable transportation, not just performance).

Can you drive and maintain a drivetrain like this for 'free'? Why didn't I just put the cam in, in the first place before installing the engine.
I could have saved all of this trouble if I had installed the springs on the head off the engine, with the correct tool.
This was a mistake due to inexperience. Of course forever from now on until the engine of time I will never use a stock cam V8-
Change the cam immediately is my new motto, use the correct spring tool which does not abuse rocker threads.
SO why did I do it in the first place! Okay I get it, You want to know why I even bothered to in the first place....
I had a few reasons for wanting to use the stock LS to begin with:
1. it would be easier to tune, this was first time HPtuners, and stock cam is easy mode
2. I wasn't sure if the engine was good, just from picking it out of a salvage yard. Imagine I put a cam and springs into a bad engine!
3. I wanted to see what the maximum fuel economy with stock camshaft really is so I could compare it to the cam'd engine

However the chances of a well maintained engine being bad is fairly low. If you are VERY careful with selection I believe it will warrant a cam upgrade prior to installation, which is my recommendation from here on out forever. When I get an L33 that looks good, in the cam goes immediate.
 
#22 ·
decided it was time to change the intake manifold and valve cover gaskets. I have spare gaskets for everything just in case, I got them in the beginning and just been hoarding them. But noticing some seepage in the original valve covers and planning to turn up the boost really soon so now I am going to start paying close attention to all the little seals. Next I will replace the pcv valve also do a pressure test at 18-20psi.

Image

Image


I noticed some oil around the intake ports and especially near #1. I think that is residual oil from the previous owner of the manifold and it won't get any worse.
The reason I believe that is because there is no PCV/Oil related tube anywhere near cylinder number one on my engine, but that is a typical location for 5.7L (the original engine the manifold came from) to have the PCV oil (hose) issue in. So my plan is to simply clean it up and verify after another 10k miles or so that the oil is gone.

Around ten hours later it was getting dark and I was passing the point where I left off when the rocker thread failed.
Image


I just like looking at pictures of assembly to help my memory
Image


Only real comment here is that the engine is very dirty from daily driving many miles already.
Also notice the orange terrible color coolant. I keep flushing but it gets back to crazy orange ugly after a week each time.
That is why I don't buy a new radiator and fix the radiator cover/shroud properly, I don't want to waste a new radiator on gross orange water.
Instead, I will change the engine and radiator together one day probably. For now I just keep flushing. It is getting better but I keep slacking on the flushing and it starts to get bad again. I'll be far more selective for the next engine for these small details I've had experiences with that left a bad taste in my mouth, so far its been:

1. exhaust 'stub's/broken rusty manifold bolts take them all out before you buy the engine
2. do not abuse rocker threads, never use them for changing valve springs
3. orange color coolant 'rust' check for this insane conditional color before you buy, the color rust stains everything, gets everywhere


As a beginner to LS platform I wish I knew how annoying these few things would be, luckily its the sort of thing you can avoid once you are aware of the experience (the reason I put this stuff up is to help other people avoid my mistakes)

I really enjoy making mistakes that don't cause harm, because you can learn and move on quickly without having to recover
The major mistake I made doing this that did cause harm was working outside in the sun and heat for two days straight without the right cover/equipment/food
It put me with a massive headache and chest pains curled up in bed unable to think or sleep, just lay there until it stops for many hours.
The night time here is dark, but hot and humid like a jungle, despite there being no sun it still overheats the human body quickly, you are soaked and overheated.
I should have had an ice bath ready or something but just trying to push through the heat to get the job done, big mistake, be careful if you live in this sort of climate. I vowed not to do any of these things again but this isn't the first time I wound up sick with heat exhaustion or whatever caused that condition.
Image


lol ^^ this picture. I couldn't find any black electrical tape and I had to wire in a 4-wire fan plug so I was forced to use white tape.

Before this I just had that one fan hard wired in, you couldn't unplug it. If you wanted to take the radiator out, you had to set it on top of the core support, or cut the wires lol. I did a lot of work inside the engine bay with that radiator sitting on the core support in order to avoid cutting these wires... But now they will simply unplug. And have white tape. -.-

Image


This is just a neat picture
Image

I am WOT everywhere at 3psi of boost I think it run's 12's on 87octane. The cylinder head I removed and the plugs look excellent, there is not the slightest sign of issues with the 87 and 3-4psi, I've been using it in the hottest parts of Florida day after long highway drives, fully heated engine bay and full sunlight, and it hasn't even misfired once 20k miles.
There is a certain technique to getting so far ahead of all the traffic and instantly going 40mph from a zero start without making the slightest exhaust noise, like a tesla can do. Except its not a tesla, there is no indication whatsoever of how or what the ^&!@# just happened. And I laugh pretty good each time because the low compression and massive displacement is doing it for $2/gallon, at just 3psi of boost, the car is incredible and surpasses all my expectations everytime I put the pedal down.
Image

I'll close with a bunch of finishing up pictures and a video will be added eventually of footage I got, where I briefly run through all of this stuff but in a video form
Image

Gota say that paint is holding up remarkably well considering it was NOT clear coated and that I've been man-handling it with direct skin contact repeatedly over the course of several days.
Coilpacks I have colored based on how bad they looked.The reddest coilpacks are/were the worst looking ones before I painted them, I figured they had the highest chance of failure, then I put the worst looking coils near the hottest part of the engine to facilitate that failure (I am probing for weaknesses in LS platform everywhere I can to gain insight and reliability reports/data).

So far, not a single misfire to speak of once it was tuned properly it ran fine ever since. Kind of nice to put the worst looking coil in the worst possible spot and still have more than adequate ignition stability. It is my pleasure to announce that so far every coil has worked I haven't found a bad one yet.
Image

The lines are extra-long because I plan to re-route them soon and make some other changes to that area
Image

I'm going to make something to separate the regulator/fuel lines from the hot exhaust manifold, not that they need it but. Just in case fuel ever goes spraying, I don't want any of it coming near the exhaust system.

Image

I haven't spent any money on dress up or unnecessary items. Everything is as bare bones as can be in the true spirit of budget daily driver.
Image


After I get some miles on the 'new' head (many heat cycles) I will eventually be drawn to dyno result
Then hopefully some track results, would be really nice, It's been fifteen or twenty years since I've been to the track, f
inally now with a car that can leave from dead stop quickly without feeling bad about the clutch.

check back for video

Cam swap video first attempt![/size]

Annnd.. As soon as I pick up the car and connect the laptop a hurricane shows up.

Classes started cancelled till wed but still have to keep up. Still I found plenty of time to upload about 12 different revisions each tweaking camshaft idle and various transmission tweak. I've probably changed around 30 settings in the oem ecu to 'help' it drive the way I think a car should drive. But its wet all the time! So yeah.

---------updates----9/4/19--------
my first LS cam idle clip! now that hurricane went away
make sure using headphones for best audio idea (my camera is not great to begin with)
 
#23 ·
corona virus update I guess!

Another set of rears were done. These were 26.7" and spun way too easy given the torque this thing puts out.
Image
Image


This time I went with 27.6" diameter tires. And the difference was night and day.
Image

Image

Image


The huge new tires meant It was time to align the rear once and for all so I got some P2M rear upper control arms to set the camber 0* straight up for maximum longevity.
Image

Image


Then I just couldn't stop taking pictures
Image

Image


I got the car with 184,000miles and now it has 208450. Plus I drove it some prior to the speedo hooked up.
Thus the front tires have over 25,000 miles on them, and still look new to me.
Image

Image


When I got the alignment done on the rear, the front was still perfect didn't need to touch it. Which was great to hear. Drives straight as a new car.
Finally after what feels like years, I went back to the junkyard for some next shields.
Image

Image


In my mind, the entire underside of the car has these thin lightweight shields to protect it from debris and dust. One big one came from an explorer I think, and now it covers the entire fuel line and transmission cables/wires side of the car. It fit so well, even the bolt holes seemed to line right up with the car. It's bolted in about six places, very sturdy. And in the front its hard to tell but there are three, the lowest one is made from a soft insulation type of material and acts sort of like a soft buffer, first line defense from water and dirt. That way the shields under (over it) don't even get dirty.
Image

Image


Gradually closing up all the open spaces under the car using shields and a variety of insulation type of materials.

One day I was getting off the highway, downshift 3rd like every other day and hit it like usual. This time the wastegate line blew off and boost must have pegged the map sensor.
The car flew down the offramp so violently fast, I thought for sure something would be broken by the time I let off. It happened so fast and I was in a nice trance.
It felt good and left a nice smoky trail behind me.
I came down from that and couldn't figure out how to express my feelings over what had happened. That must have been over 600ft*lbs of torque! I kept repeating the experience in my mind, what this car is capable of continues to surprise me.
Unable to express it with words, I added my feelings to car the only way I knew how. It earned a new badge that day
Image

Image


I took a minute to refresh the stripes with some brighter colors
Image

Image

Image
 
#24 ·
Next I noticed the rear brakes were also nearly gone. Only got 25k from them? But they were $9 so what am I complaining about.
I took them apart for cleaning
Image

Image


This time I bought some higher quality pads, maybe they will last 40k instead of 25k, that would be nice
Image

Image


Also took the time to inspect front brakes. They never seem to run out, I've never had to change the front pads on a 240sx before (with 300zx brakes)
Maybe its because I engine brake to conserve fuel so much. I have the converter set to stay locked in decel with a fuel cut, so it acts like a manual transmission engine break. brake?
Image

Image


since I was in there anyways I took the time to clean and grease every metal part I could touch and see
Image

Image

Image


I never got a chance to show off the starter area. This is kind of a funny story. When I first finished the cam swap, I drove the car and everything seemed normal. The next day however, I warmed it up and then it wouldn't start hot. It would slowly crank, like a dead battery. So I put jumper cables on it and it still wouldn't crank, I was thinking the starter was heat soaking. So I actually changed the starter and added insulation and shields.
Then the problem happened again and I realized that I had forgotten the engine ground cable. Yeahhh.... I did forgot something so simple. At at least now I have this really cool starter shield area. It also covers the battery cable.
Notice I also kept the 4l80e dust cover. This car is all about abusive daily driving conditions through splashing mud and water. Pretty soon I hope to have the entire underside coated and shielded away from the road.
Image


You know an engine is too big for the car when
Image


At some point I guess I said enough is enough and had it tinted.
Image

Image

Image

Image


It really needed the tint. I don't know why I waited so long.
Image

Image

Image
 
#25 ·
Tons more pictures showcasing the paint and body


I originally chose this car because I felt like it was in pretty rough shape. Like no matter what I did, it couldn't get worse.
But now that I am starting to look over the body and forget about the engine, I'm beginning to realize its not in as bad shape as I thought it was.
No replaced panels, clean quarters, original glass, hood and bumpers, clean looking seam glues, comfortable clean interior, no rust... It has alot going for it.

the full album from the last ~4 months (I didn't post every single picture)
240LSX364L80E_18 — Postimage.org

A few videos I made over the last ~4 months:
Driving around

First time using 14psi of boost

Some shorts from feb


would like to dyno and track it but am too busy with school atm. Hopefully near the end of April I will have a bit of time for those dyno and track testing. I built the car to drive around for fun, and part of me doesn't really care how much power something has as long as its fun to drive. And this thing is absolutely a blast to drive, I just drive aimless and get into trouble. I turned the boost dial up until it spins a bit through each gear and whatever power that is- is more than enough for me.

maybe its better not knowing
 
#26 ·
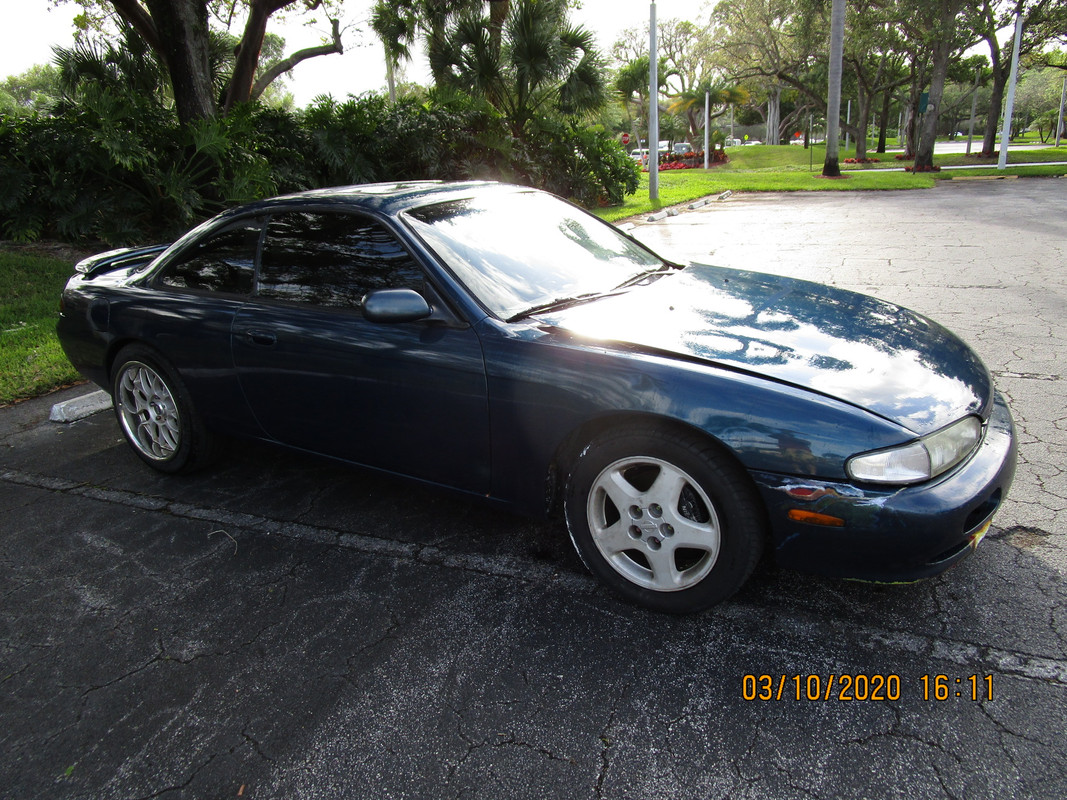
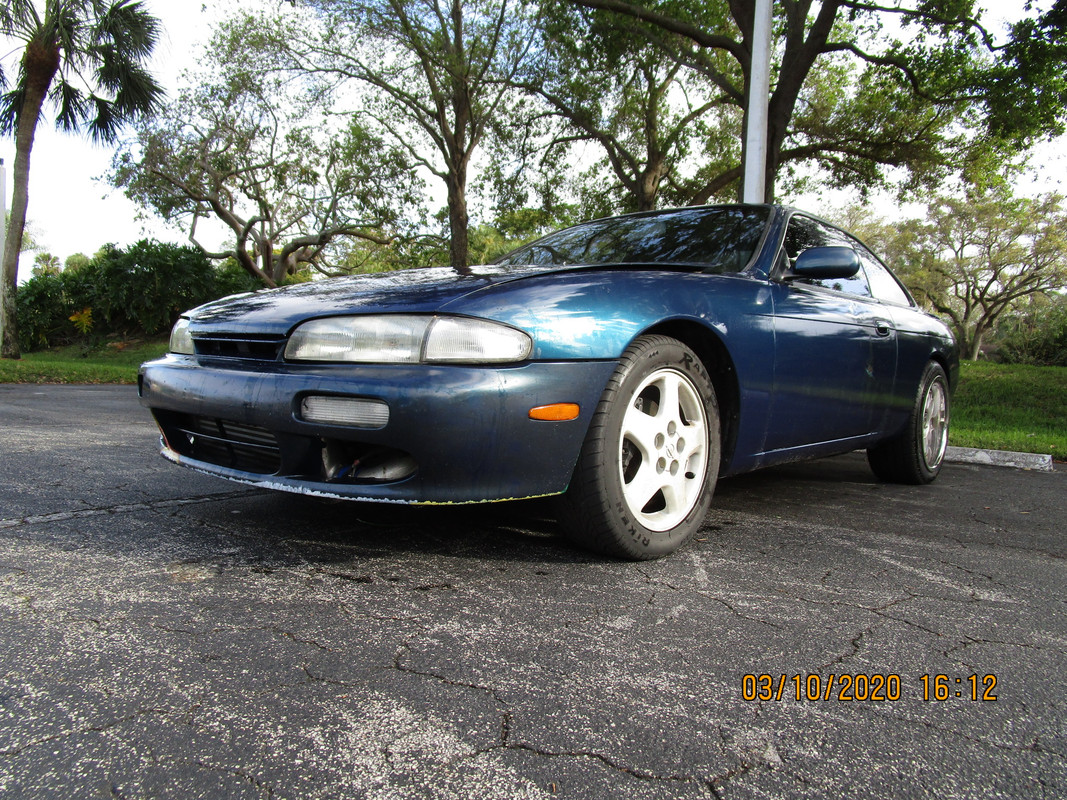
This post contains the DYNO graphs and DYNO video along with a discussion and theory content.
You might be wondering why I waited soooo long to dyno the car.


There are many reasons, and I think it worth a minute to stop and examine the main ones, other than I am worried that it might explode violently because what crazy runs 15psi without methanol in this kind of weather on purpose? Okay, we will get to alcohol land, I promise. But first, I need to establish some baseline rules to the highest mileage LS for my collection of data, because this is my first LS engine ever and I have no idea what I am doing, or it is really capable of. This is the moment to make mistakes.
If search for tuning knowledge we get a VAST array of results. I was curious about stuff I had never seen before like transmission shift pressure. Just because five ways are different doesn't make them wrong. But not everything that comes with the Original computer is safe to use either.

Tuning the OEM ecu is like tuning an incredibly complex interworking of maps and numbers for which around half of, I have no idea what it does and the description is vague. There is an overwhelming abundance of maps to fiddle and fuss over, and yet somehow it manages to lack fundamentally useful features that every stand-alone does have. A lack of real time tuning where applicable & any model of having to shut down the engine to actually send a tune file is limiting in that one can not adjust in real time to see what something does or causes. So for most of the tuning I have done so far, I did the way they usually tell you not to do it, that is, by adjusting the variables by "feel" and then just uploading and assuming I was right. It has gotten me into trouble but then again Empirical testing is always necessary to some extent no matter what the application when setting up new hardware.

The OEM ecu once dialed in, is actually potentially easier to tune than a stand-alone over time, because it makes use of exact masses of air and fuel wherever stand-alones tend to be very general in their approach to fuel and timing. For example a stand-alone usually has a main timing map where you would expect to see applicable timing values.
In the OEM ecu, the main spark table depends on at least 10 different maps, all configured "already for you" (HAHAHAahahaha... good luck) by the OEM manufacturer, and are some hidden or disabled or difficult to discern what it's really going to do. For example if you put a negative value into the "PE Adder" map it will dump 999% fuel injector duty cycle to your engine. Not joking, it could hydrolock the engine to put the wrong value into one of those many tables. You have to know what you can do, and what NOT to do, and what you can get away with.


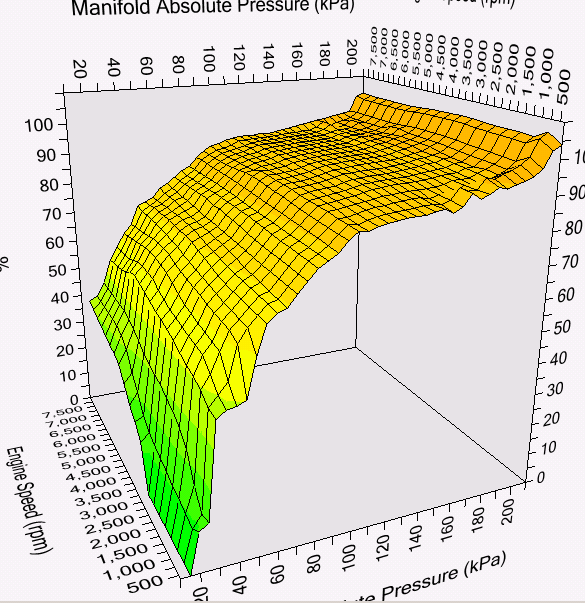
The timing map itself reads in "g/cyl" whatever the heck that means is up to you though, there are ways to 'fool' the computer but I don't recommend trying because it can influence transmission pressure among many other things I think, seems like too much work. Most boost setups are going to peg 1.2g/cyl limit in this ECU so there is alot of complaining on the forums, some talk of "scaling" but I have found a somewhat water down solution using a map called 'afr advance' which allows you to avoid scaling. The computer has no way of knowing whether you are seeing the correct ratio or not so there is a flexibility with commanded a/f vs timing. So it looks like one might use it creatively to achieve desired timing at any g/cyl and so far this has been the case in my experience. You can see the difference in timing map values commanded vs actual in my logs.


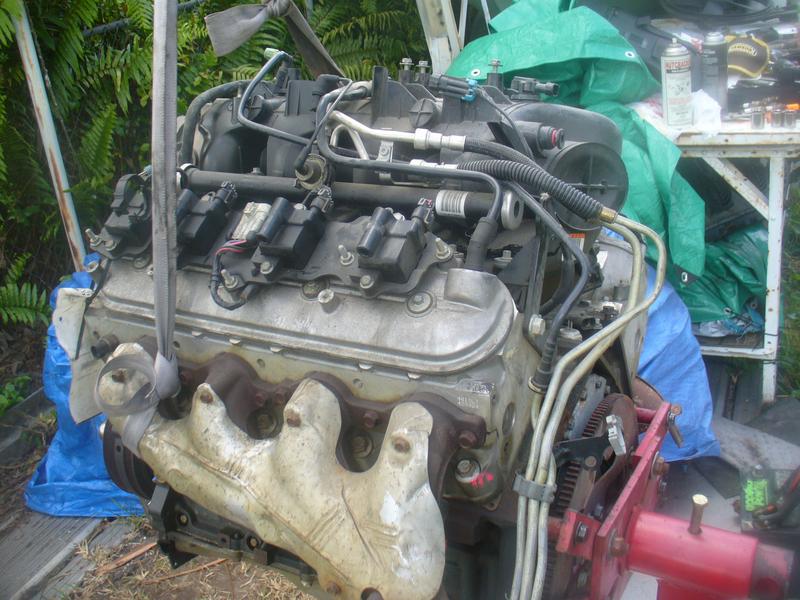
reason#1: Wasn't sure the combo would last or survive in Florida's insane heat with just gasoline.
I wonder if 500rwhp dynojet without water injection would be too much to ask from stock un-gapped piston application, on the hottest day of Florida weather? I've lived here all my life an that day was the hottest day or as hot as the hottest day. And you can see my IAT is like 110*F which is right about max where you would put up with it for this type of day. Cold pipe stayed merely warm which is another good sign. Turbo should be right near the center of it's island so, coolest air possible off the compressor.

Airmass calc was 65lb/min I think, which is a little high even though I was going lean and not out of fuel pump. The sudden jump in VE right near 205KPA to 210KPA surprised me. If the calculation is anywhere near true, the engine is making some 600bhp; 600 * .83 = 498rwhp through an unlocked 4l80e, the most parasitic modernish(overdrive) combo on the planet to put behind a V8 afaik.
You can look around and do some research but I do not think you will get much of a solid answer. It wasn't that I had to find out for myself necessarily; clearly alcohol is superior and it will need to work its way into this build eventually. All cars should wind up flex fuel IMO, what a great option to have. The real reason I had to do it is because I want to drive the car right now, for the last 3 years, and not have it sitting and waiting for me to perfect some kind of amazing fuel system. Instead of waiting I just popped a $99 fuel pump in the tank and started driving to work everything else out more or less before moving on to the aspect of fueling 600+
Also now knowing what i t makes at 3psi, 7psi, etc... we will accurately predict torque vs boost and help to find where the turbo 'runs out' without running it too far off the map or IAT too high during testing.


I think its not a big deal when you look at displacement vs torque, a 2L can make 300ft*lbs of gasoline, so a 4L should handle 600, so the 5.3 should be able to achieve something like 800ft*lbs of torque on gasoline. But that is obviously crazy... right? Well notice we did not mention power. The increase in power is going to create more heat as a byproduct in a short time frame, which is going to negatively influence the gasoline quickly making it dangerous to keep going. That is to say, the stock engine could probably do 750ft*lbs at 3,500rpm on gasoline if you let up before it heats up much. But we live in the age of alcohol so don't be crazy... after 600 or so its time to add alcohol (lets get serious about safety). I am thinking aux fuel cell in the trunk maybe 5 to 8 gallons with E85 on a mixer that I can dial the E10 from primary 15.5gallon fuel tank into roughly ratio of E30 or E40 between the two. Does such a thing exist? It sounds complicated. In reality when I get time to research many months I can safely drive 500rwhp in any weather while I decide how to handle the issue of alcohol safely. No way I am putting alcohol into the factory fuel tank though. Protip: Alcohol is a powerful solvent and anything in an old tank that was insoluble in E10 gasoline sitting on the floor of the tank could suddenly become dissolved and quickly clog the fuel pump and wreck the entire fuel system. So it is something I would do only after dropping the tank and fully cleaning it which may become the option I go for. I could simultaneously reinforce the known weak points of the tank strap area. Still I like the idea of extra capacity fuel cell. Gonna munch on it while I abuse what I assume is an insanely low compression fully worn the #(@*@# out truck engine. I mean it has 150psi but you should see my 15th scanner log, 15.5psi and 12.5:1 air fuel ratio through peak torque and it didn't even twitch on the worst possible day. I bet the bearings all look mint. Not gonna open it to find out.

reason#2: Doesn't make sense to dyno a fresh swap, only to have it blow up months or weeks later and have to replace it (and then need to re-dyno same old).
I knew I could take an engine (any engine) to the dyno immediately and press on it. But some forms of damage take time to build up... for example the oil system could be weak and gradually result with eating up the engine bearings over several months. You wouldn't see that on the dyno in the first few weeks of a swap, but eventually the engine would blow and you would NOT know why, doomed to repeat the same mistake or failure. On that hand, it has nothing to do with power; the installation can simply have a fatal flaw. Its just far more important to me that the installation be bullet proof and reliable than actually make some inane amount of power. Power is just a bonus to having a reliable car in the first place, reliability comes first or you can't even drive it.

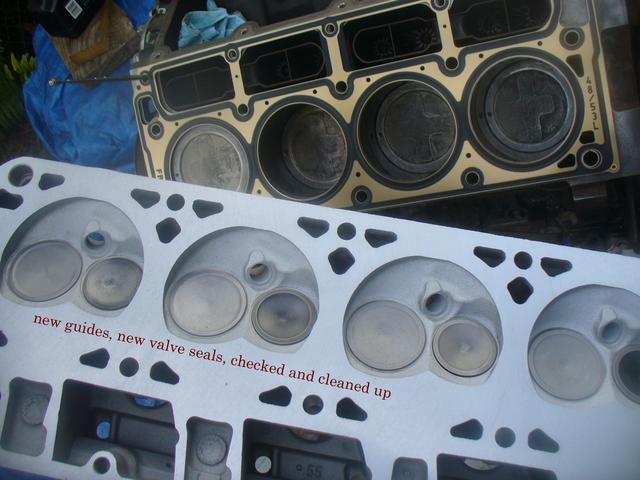
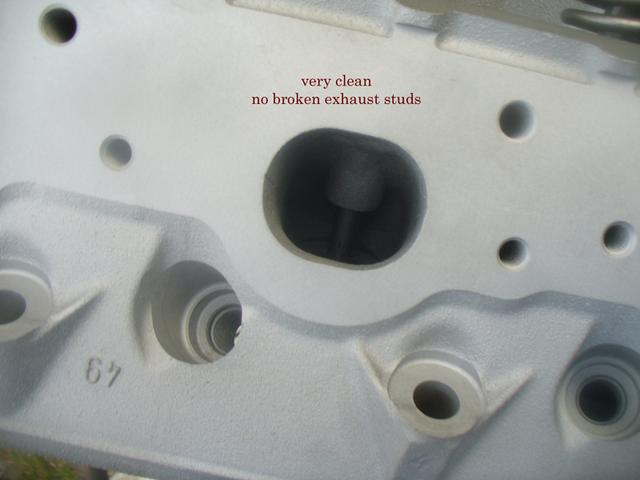
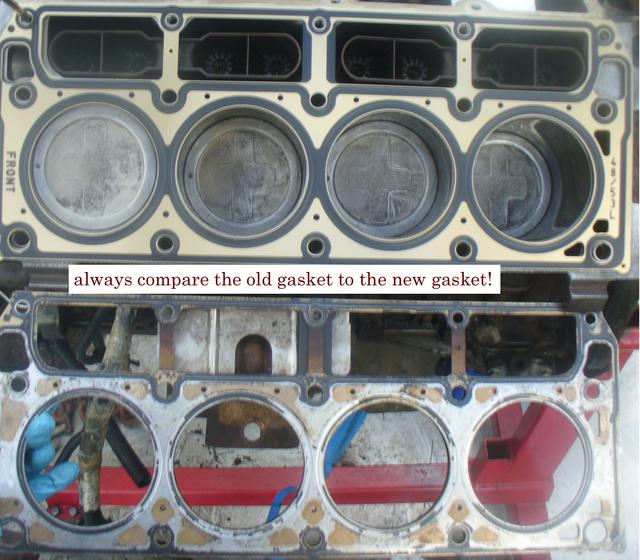
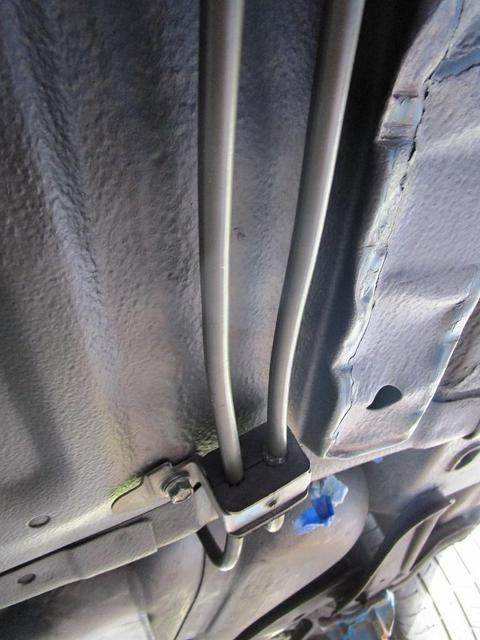
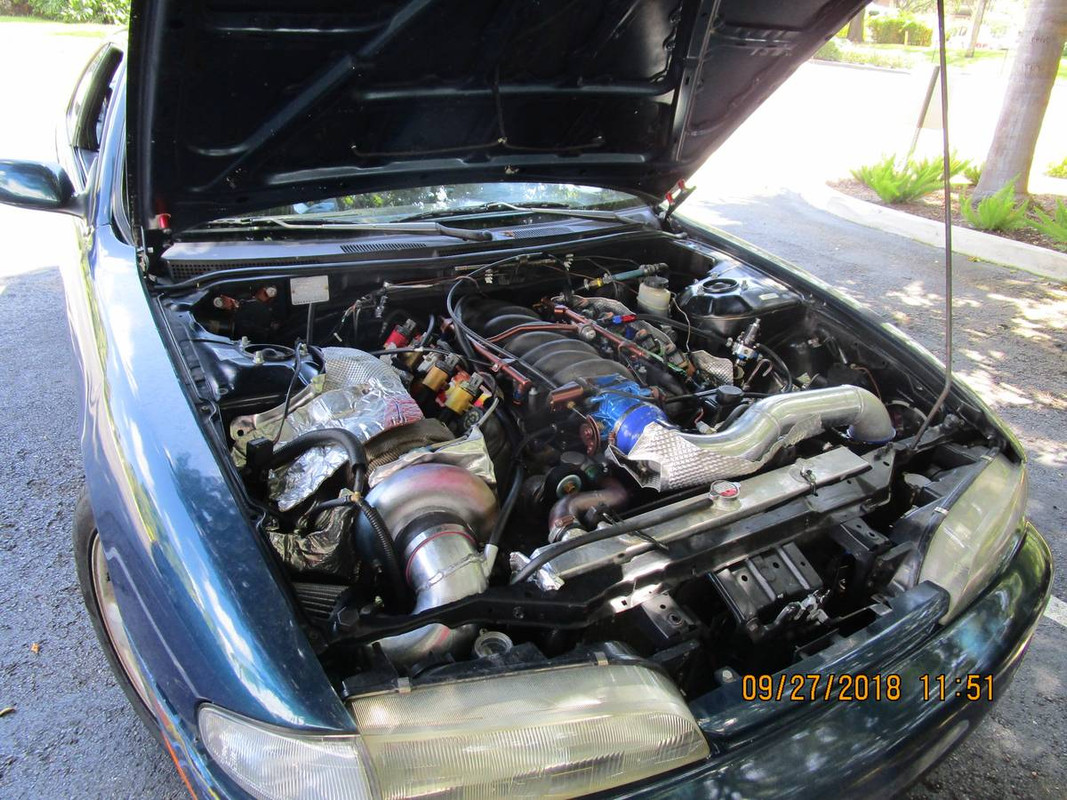
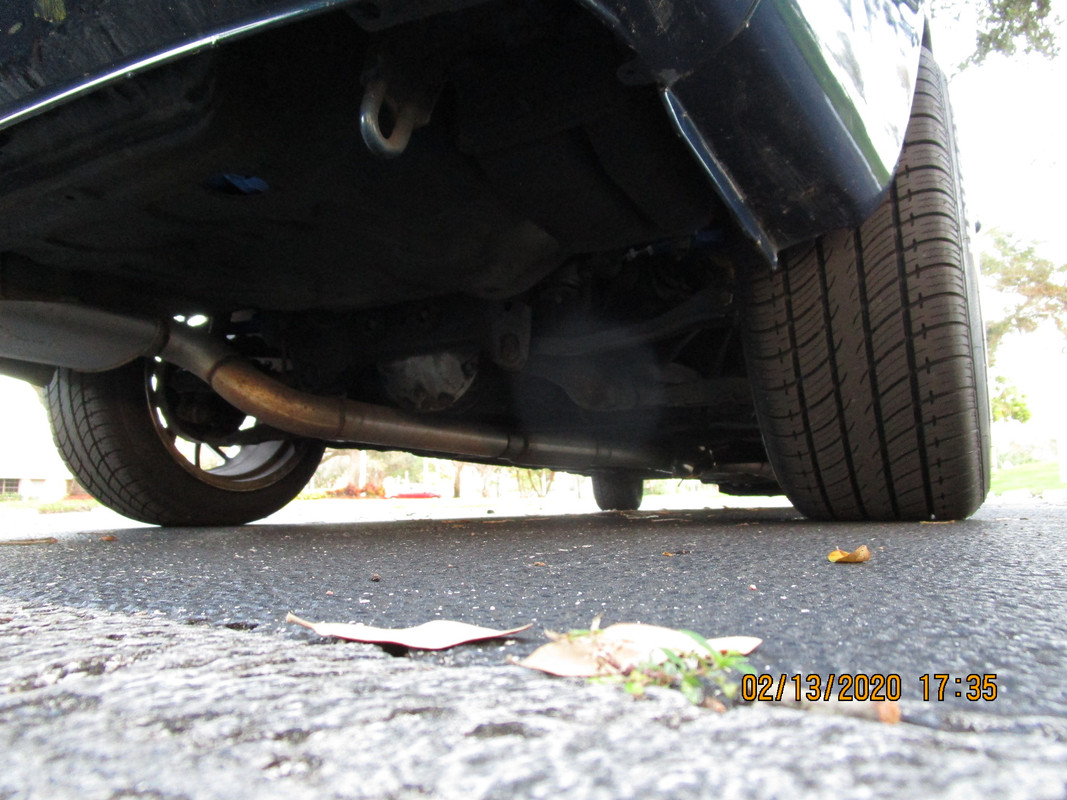
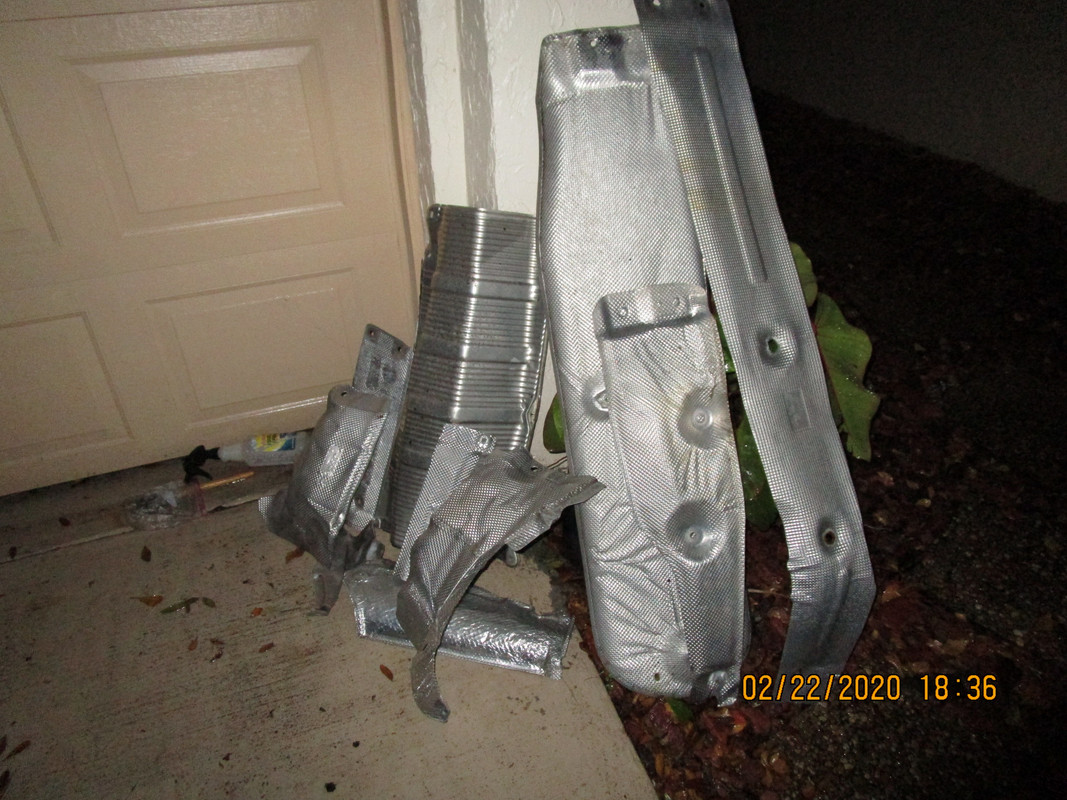
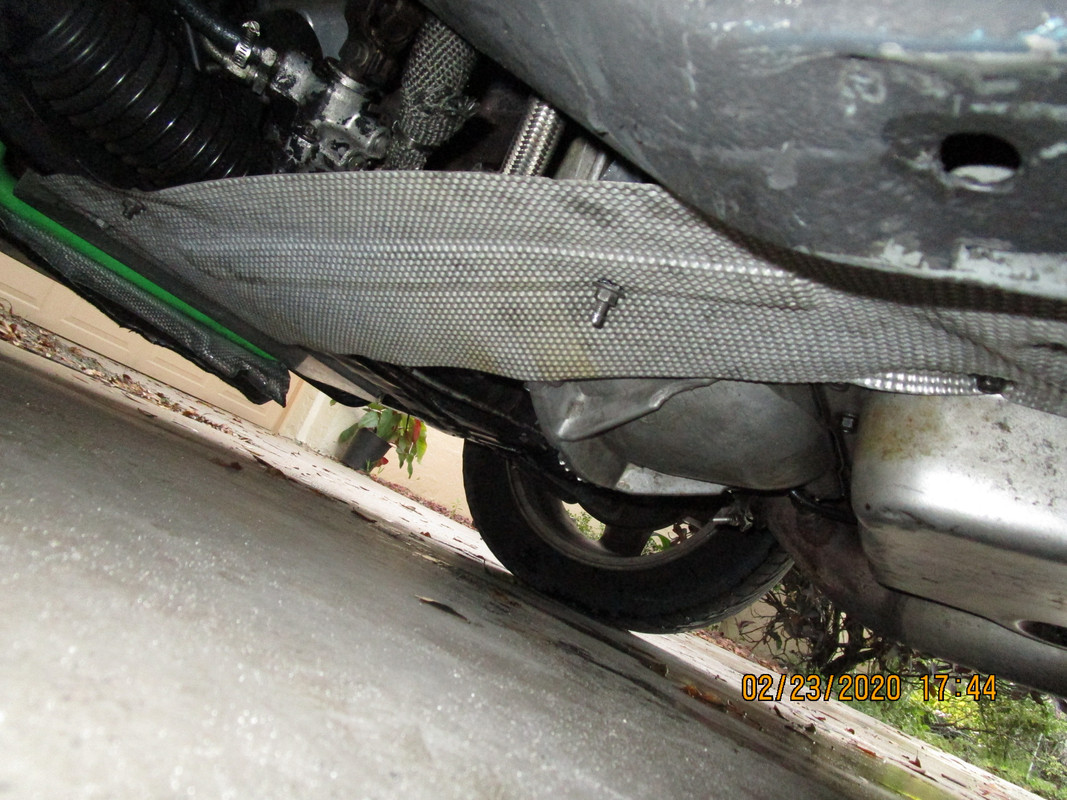
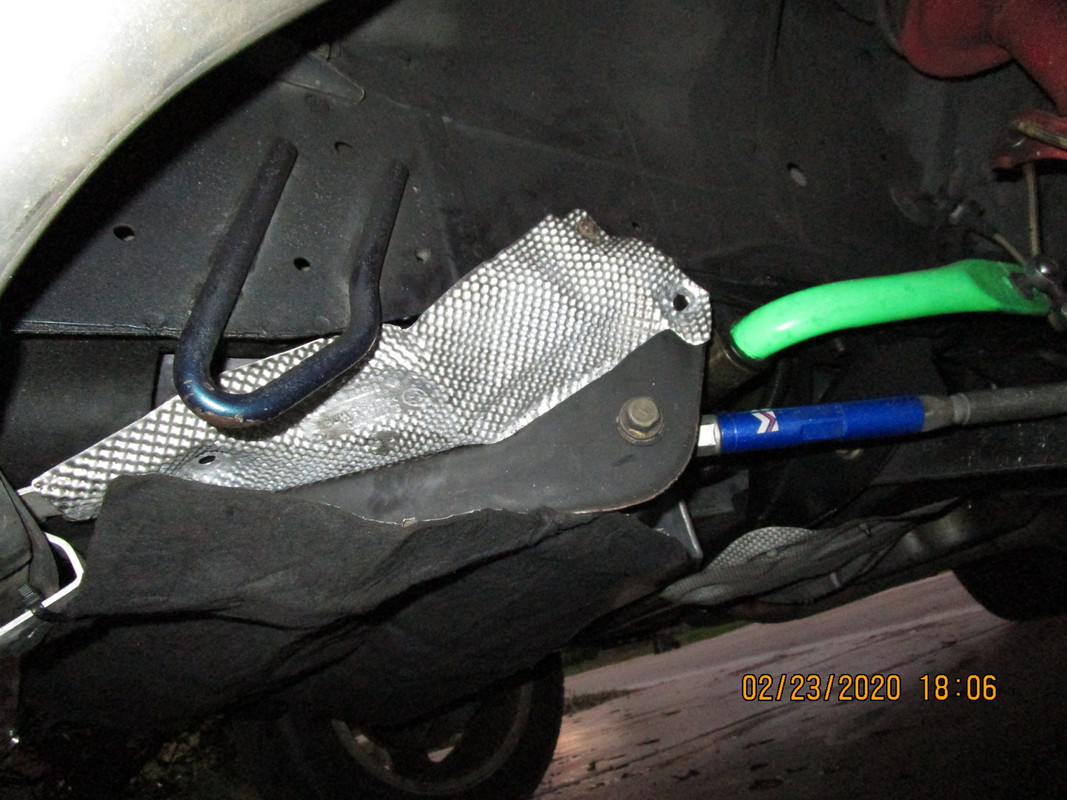
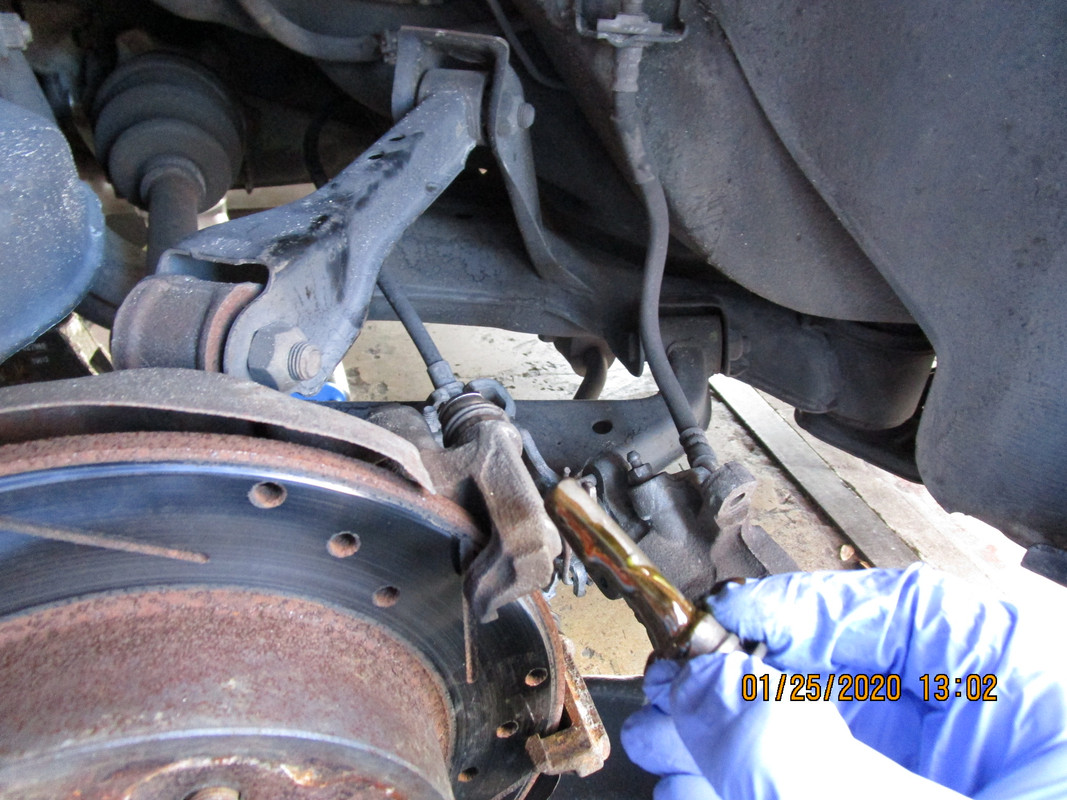
By waiting, I have more or less ensured that the combo is a reliable entity, untouched for years exactly the way its been all along. The gaskets have all held perfectly, many many heat cycles so they are 'stuck' down to the engine parts, 'glued' together so to speak. A fresh gasket might be tempted to blow out easily but the old ones are like glue sometimes, know what I'm sayin'? The spark plug wires have almost 30k on them and still look and work great(coming from SBC land, this is remarkable). The boost pressure test(turbo->intake) reveals no boost leaks, even with all the clamps kinda loose and a 20psi test pressure... crankcase is sealed so well you can blow into the vent and put your finger over it and it will hold air like a balloon. hint: use a supra pcv valve... its pretty amazing how well everything fits together.
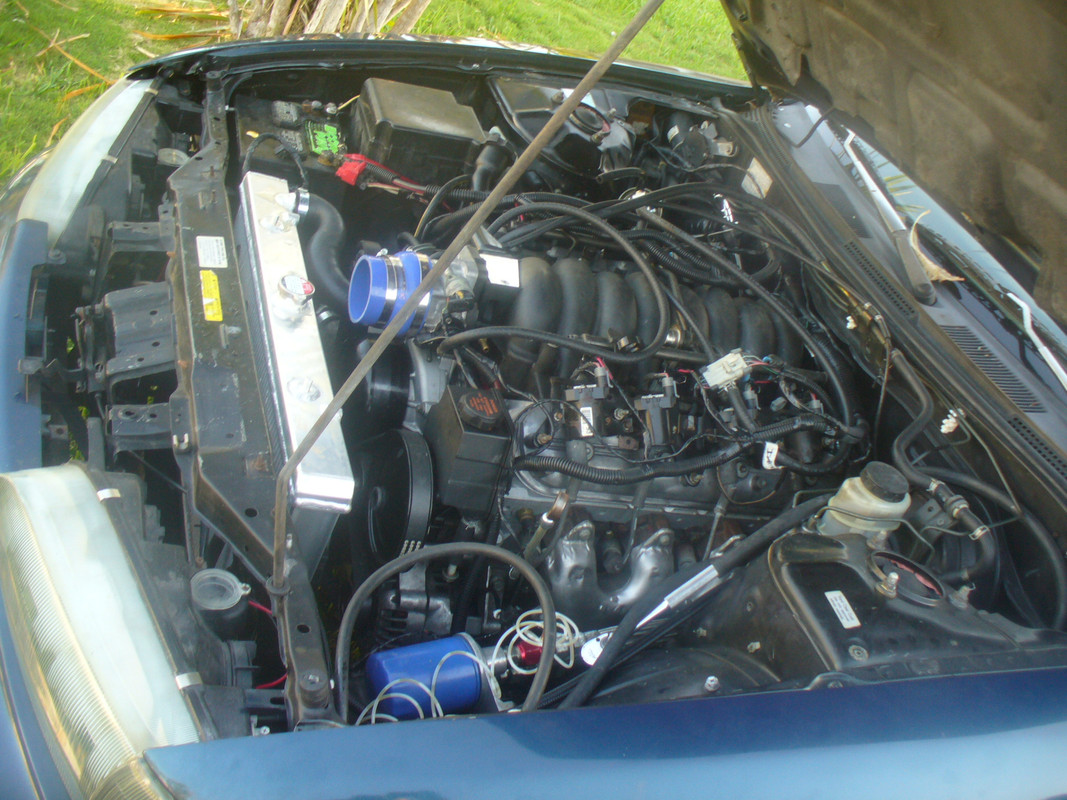
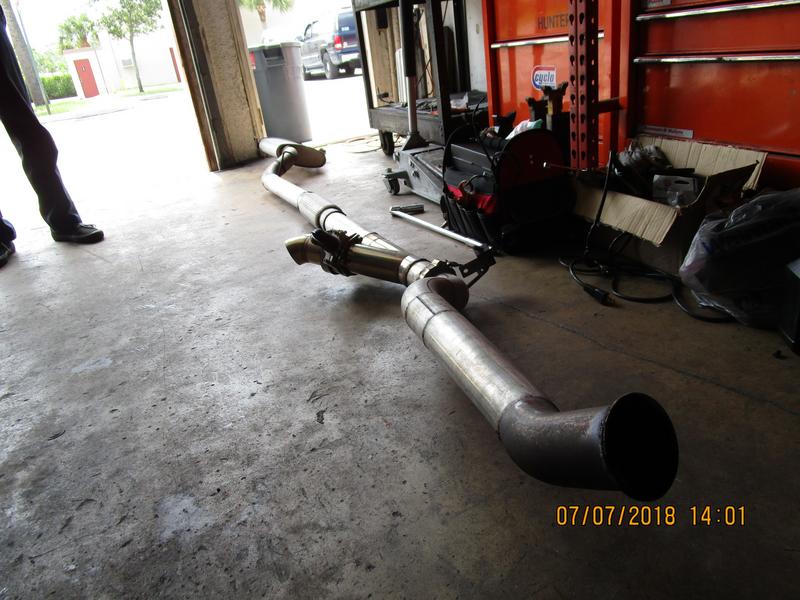
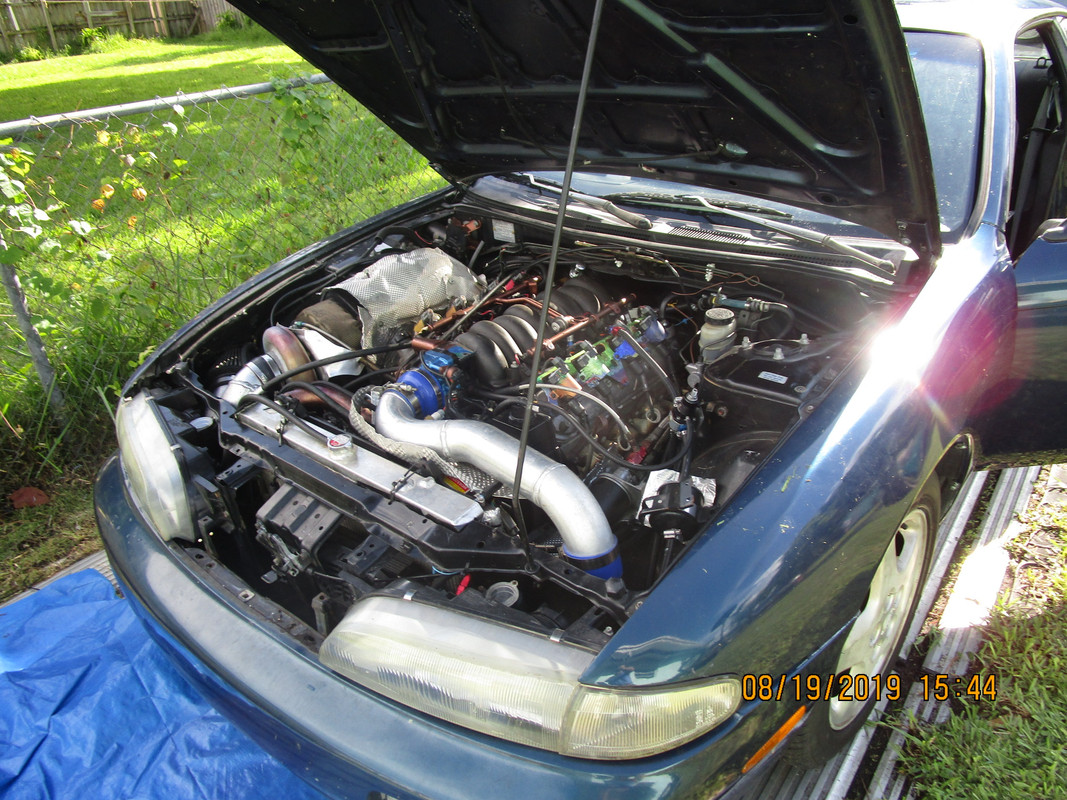
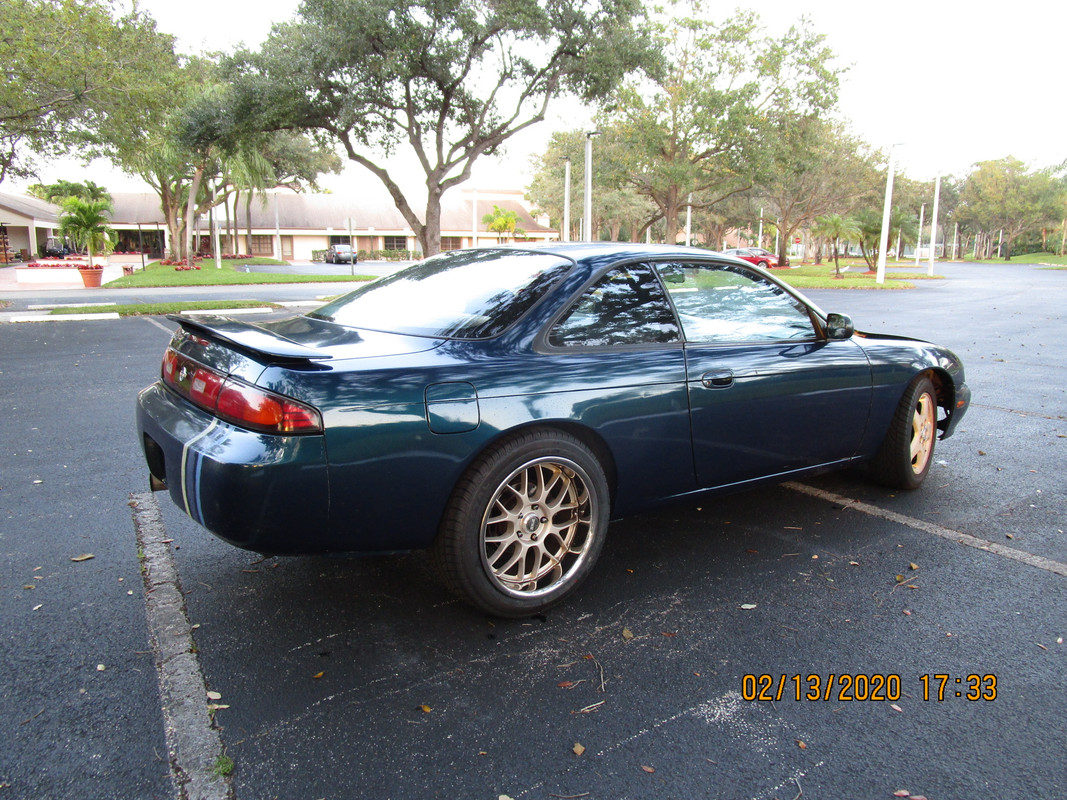
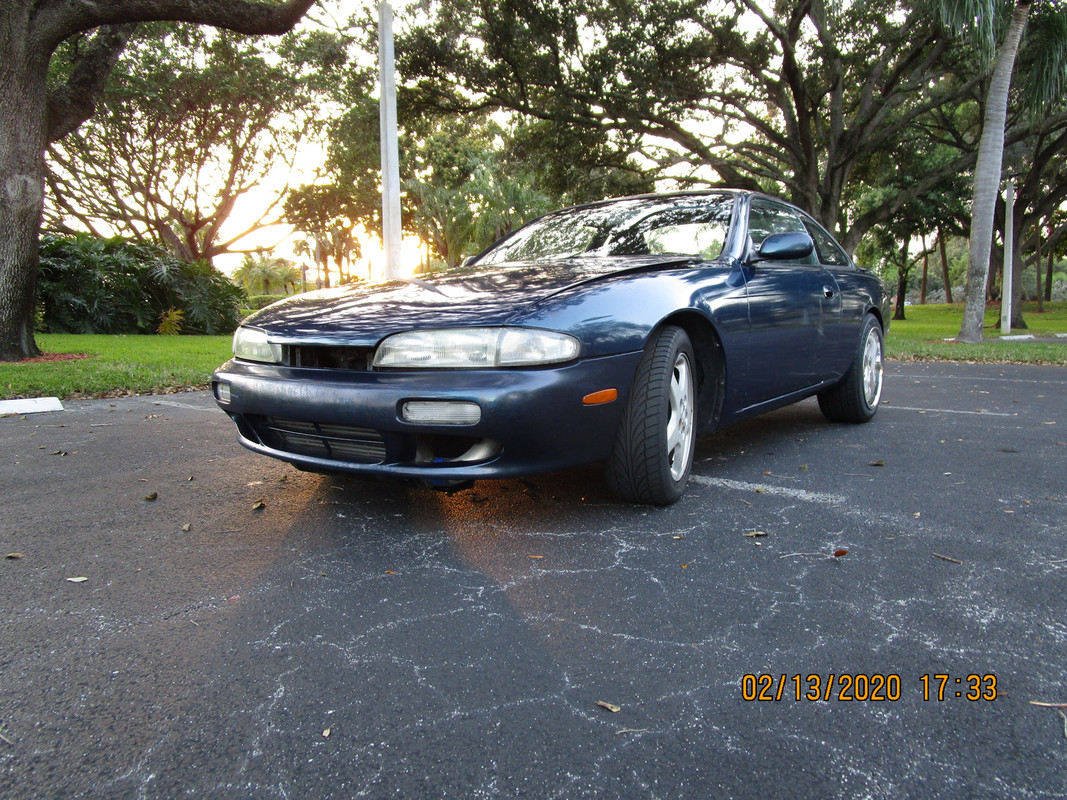
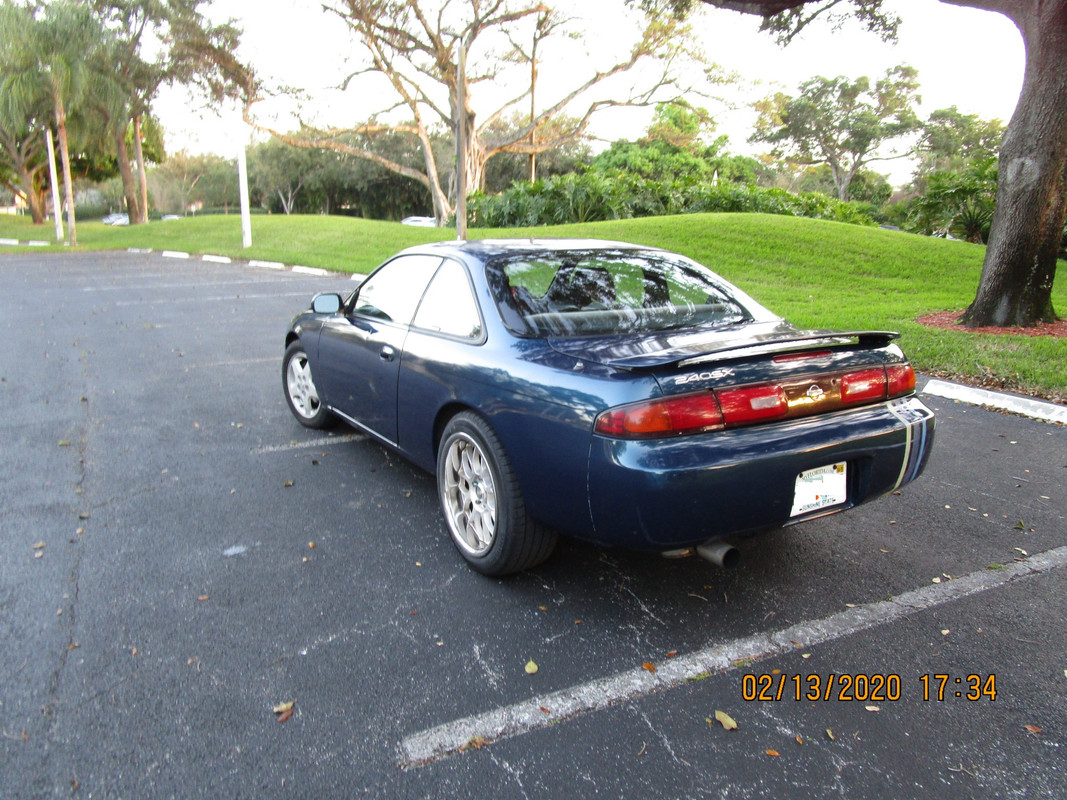
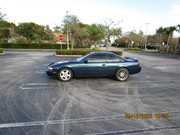
Just another day for a truck somewhere

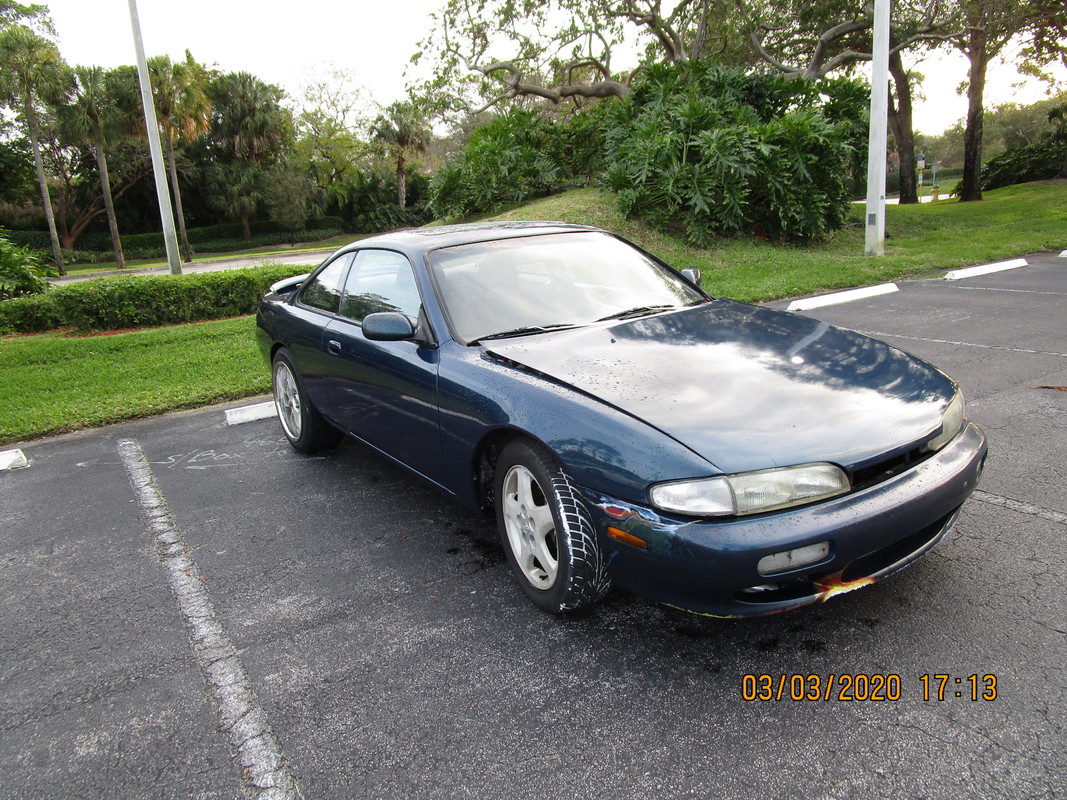
I didn't even check the oil or pop the hood before the dyno day. I just hopped in the car and drove it there like a daily driver you expect to run perfectly, that oil has more than 1500 mileage, and wound up driving it home the same way. And no, I don't have AAA or any kind of towing available. I am not sure what I would have done. I just didn't expect to have any issues... You don't have that kind of confidence in a swap unless you've been driving it every day for years. And i am not gentle, usually its 1st and 2nd though not 3rd very much because 3rd is for the track mph. I bet I can wing it out to ~6600easily on track day for 130-140mph. But rpm can be a deal breaker for oil systems and other things. We will see, I might drop to 4.8L or beef up the valve train a bit. My dream is solid roller of course but that adds unnecessary expense so.. I can't justify the cost of a custom cam. This car needs to maintain itself.

I've never had this engine much over 5400rpm before either. I always shift early 5400ish (setting is like 5100rpm) because there is always a delay and the delay is based on how much power you are making. The more power you make the higher the engine will accelerate before a shift potentially can occur. For example at 3psi if I command shift 5200 I get 5300. But at 15psi you command 5200 you get 5500 sometimes 5600 5700. The delay becomes more pronounced usually, but not always, its kind of random and crazy within some range. I stopped trying to figure it out and just waiting to max power first, then I will dial in the track shift exactly right.
The dyno was the first time she got to stretch her legs to 6200rpm...My street limiter was always 5800 but I think 6200 is fine for my application, maybe even 6500ish. I even tagged the limiter on one of the runs to be sure. RPM was sort of the final test I guess. If it could survive the hottest dyno day possible I suppose it would theoretically survive anything else I can come up with on the street, thats the idea anyways.

So here is a break down. The video tells most of the story but there are some things you should know in additional to the video.
First, I used the lightest spring possible in the gate, 3psi only. This was originally so I can put 87 octane in the engine whenever I feel like it, but I haven't used 87 in a loooong time.
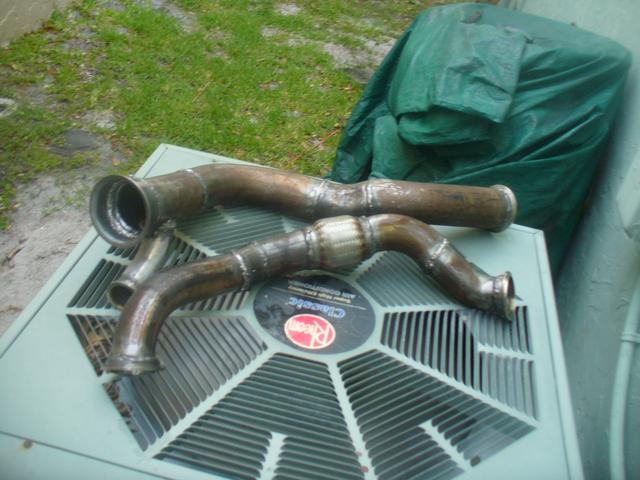
The reason I never changed the spring is that it helps us get a baseline insight to the health of the engine, if we dyno at 3psi it should put out near stock power, plus the boost, minus exhaust/intake manifold(the LS1 intake is worse than the truck or anything for that matter), age/wear (which loosen up the engine and make it more favorable to boost at a slight expense to compression), and 4l80e losses. Next dyno I will def use a bigger spring. Just remember this is my first LS engine and despite them being almost free I still don't want to break it! I am treating this thing like it's the last one on Earth... okay almost. Allllmost like that. The oil gets some mileage let me tell you.

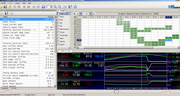
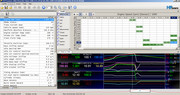
The blue line is, 3 to 4psi with the cutout closed.
red line is 7psi or around that, with the cutout closed. I think eventually I made 400rwhp with the cutout closed and like 10 or 11psi. It just won't make boost with the cutout closed because of EGP and the weak spring or I bet it could make 500 with the silent mode one day with more spring. I really love the 3psi spring though because it sort of protects the engine, so to speak. The fuel injectors already maxed with this weak spring. If I put a slightly stronger spring, it would have the potential to overboost if I accidentally adjust the boost controller wrong or something. At least the way it is now I can't accidentally hurt the engine at any setting. safety first
Orange is about 14.5psi and 500rwhp
Image

Diagnostically, it looks like something is 'happening' at almost exactly 5300rpm on every run. There is a small chance it was just the ignition pickup needed to be moved but I never thought of that during the day. Another possibility is that we are seeing some kind of resonant effect, maybe the ls1 intake has an issue with that rpm range. Another thing is maybe the factory lifters are having trouble staying pumped up. Because I see it happen at 3psi same as 15psi, it isn't anything to do with the timing or tuning since those conditions are extremely far apart and the only unifying factor is the rpm at which the issue seems to occur. My intuition tells me to to upgrade lifters and pushrods, and potentially to an LS6 intake manifold. But if I go through all that I will want the L33 or a 4.8L to finish the car at the same time and add 800rwhp minimum potential. Those heads ain'taver coming off that engine as long as I have a say though. Once was enough. It pulls just fine you don't hear or feel it so maybe it really is just the dyno electronics. We will see... it did not go unnoticed... I am on the case.

I don't think this attributed to the effect but I do believe the boost control solenoid got a bit overheated, and the boost started to meander on some of the pulls. I think that is what was causing it anyways. I've seen it happen on other cars but not on an auto w/ unlocked converter. It never did it on the street to me before in 3 years but it did on the way home a little, so I still think it was just the heat. I recently closed the hood fully so its been getting hot in there, plus it was the hottest day. I keep meaning to relocate the solenoid somewhere cooler but its so rare that things get THAT hot. This was a nice reminder though its on my list....
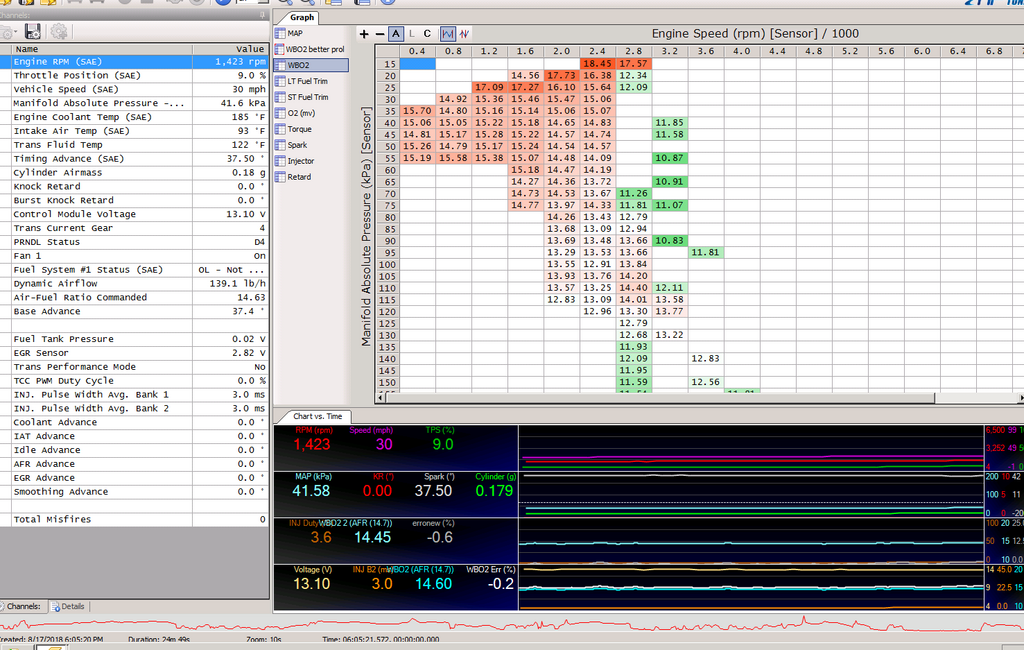
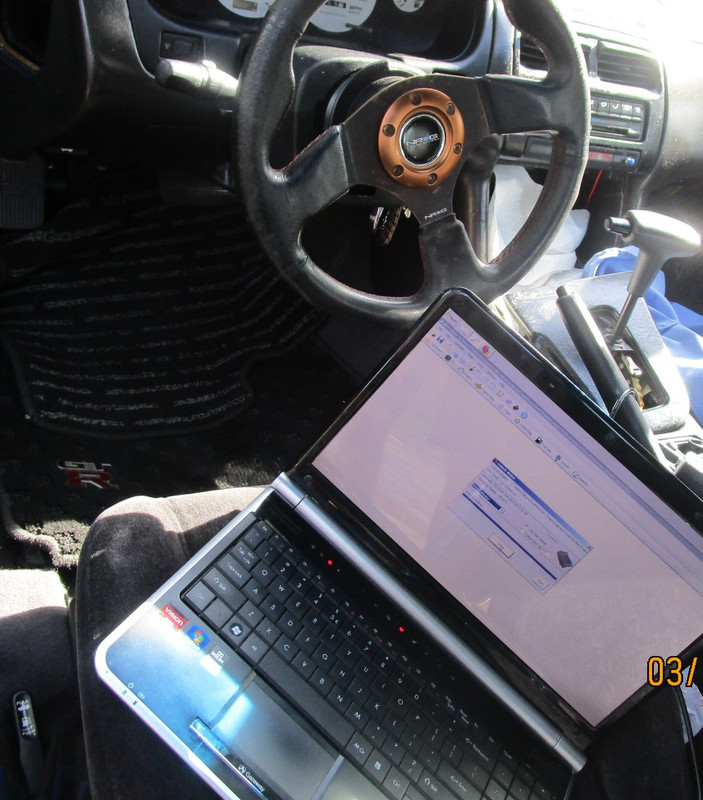
Here is the 3psi run from HPtuners so you can see how much timing I used and a/f ratio etc...:
Image


Here is the red line (7psi) cutout closed run:


Next, there were a bunch of runs where the boost would simply not go up no matter how much I tried to add duty cycle, they are all 10psi to 12psi I think, will need to check. I will post logs to hptuners website and add them.

Of course I expected this due to the 3psi spring... Nevertheless I absolutely HAD to see what it makes with just 3psi. So I wasn't about to change that spring yet. Third eye: we had many long conversations with ourselves about what spring to have inside that gate come dyno day... .
I had the 10psi spring with me but I didn't want to burn my hands off trying to change it on the dyno.
Image

I usually don't trust the in-car wideband but for these I had no choice, the cutout was making the a/f go lean.
I knew it wasn't that lean because the engine would have melted lmao. At the very least it would have burped up some oil and started smoking. Didn't get a single whif of engine oil the entire time, it was smell less. Except of course for that kind of gasoline smell that gets in your clothes after this sort of thing. I am going to lengthen the cutout and maybe add a muffler to it, something aluminum and maybe also aluminum v-band if I can manage. I wonder how a 40 would sound on that thing. It's been yeaaars since i asked myself this question but, maybe its time to tone things down to something more dramatic.

I could have made a LOT more low end torque by using a couple tricks I am aware of, such as letting it shift from 2nd into 3rd before logging, or using the dyno brake to load the engine, but in the spirit of fairness I thought it best to just do typical 3rd pulls most people are used to seeing on paper, plus it helps us compare to other setups. Just keep in mind the 3psi spring probably wasn't doing it any favors to help it spool. It builds boost faster on the street because the engine can't accelerate as quickly as it does on the dyno, this is important to reconcile with the ignition timing profile, as you can gain a bit of torque/power by using more timing on the dyno due to the faster rate of change of the roller compared to the street, but don't leave it like that because the lower rate of street pulls (rate of change of RPM) will increase cylinder pressure potentially blowing a gasket when things heat up.

I added a tiny bit of timing to some, removed it in others, boost didn't change much and neither did power. Wound up using about 0.7* more timing than I went in with which added 9hp some places so I thought it worthy.

At some point I ran out of ideas and just pulled the vacuum line for the wastegate, around run #12 or #13. I knew on the street this would yield around 23psi of boost! (it had happened once or twice rofl she loves it, for mid-range its perfectly safe because there is plenty of injduty) but I figured on the dyno it wouldn't go so high... and I was right. It hit 15.5psi on the money more or less, gave me that 1psi extra boost to make like 28 more hp, Absolutely maxed injectors of course or I would have kept going. Gota say the engine seems to posses a VERY wide tuning window, it seems happy anywhere from 10 to 12 degrees of timing at 14.5psi and just for curiosity I made the 15.5psi run at 13 to 13.5* to make sure I wasn't missing out on anything spectacular. A 2L engine is very specific, it cant be 8* or 10* it has to be 9* in some spots exactly on gasoline, so this tells me that 5.3L engine is barely working so far. It can handle wayyy more boost on gasoline. I am thinking 20 easy maybe 23 or 24psi will be possible based on what I just saw. As long as I control EGT of course.

but isn't that always the case. Nice to see that Aeromotive stealth pump kicking 500 with a 5/16" line. They say 700bhp is possible so I might just throw some 80's and make 600 soon.That is alot harder to do with 2L because boost is much higher at this power which means fuel pressure is also much higher and that puts a strain on pump output.
I am only using 53psi of fuel pressure base.
Image

HPtuners log, most of them looked like this:

* I am running an iridium 7 heat range spark plugs with 0.026" gap

The dyno video has an image error. The correct hptuners scanner file for the dyno run shown is probably this one below, they are similar in boost pressure. If you really care you can count the number of runs and then find the exact run in the log files I will provide.
Image


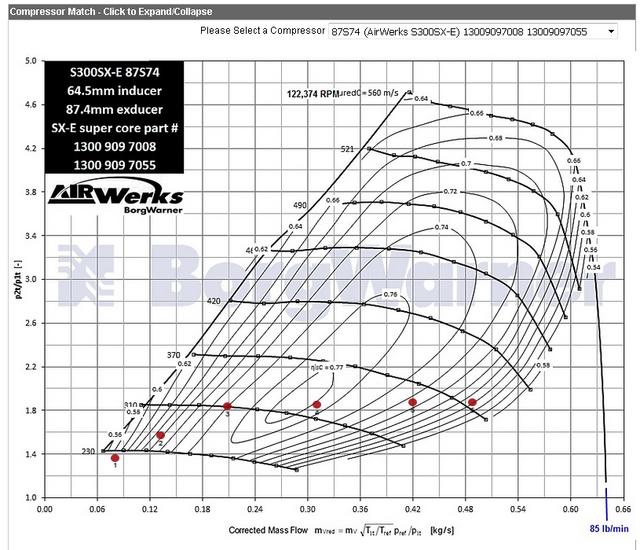
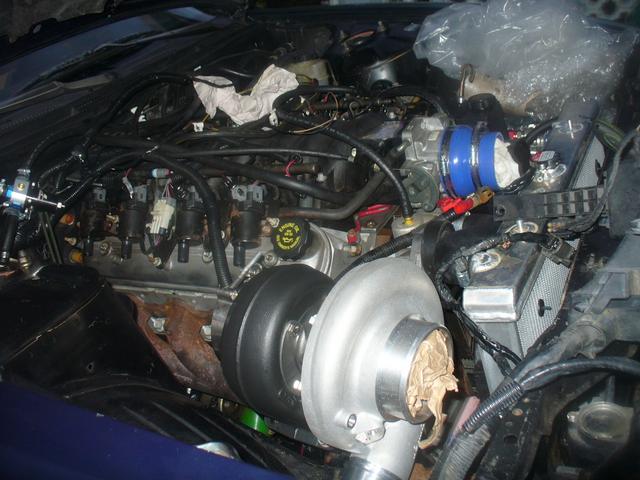
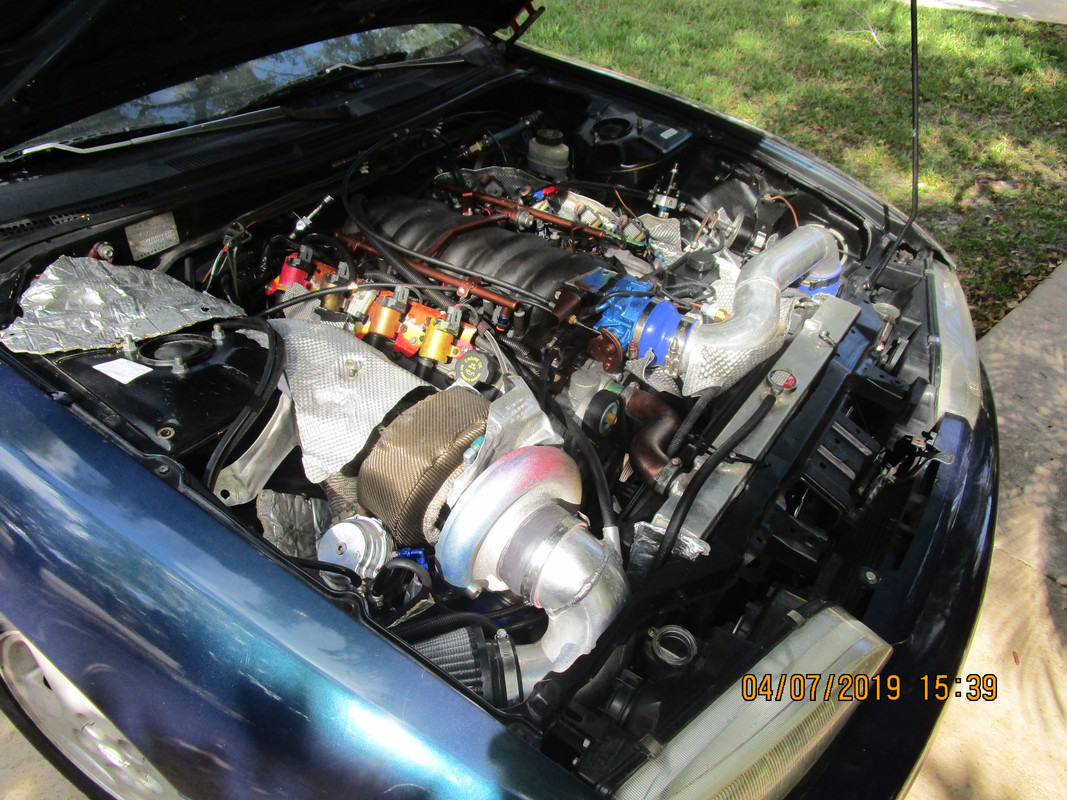
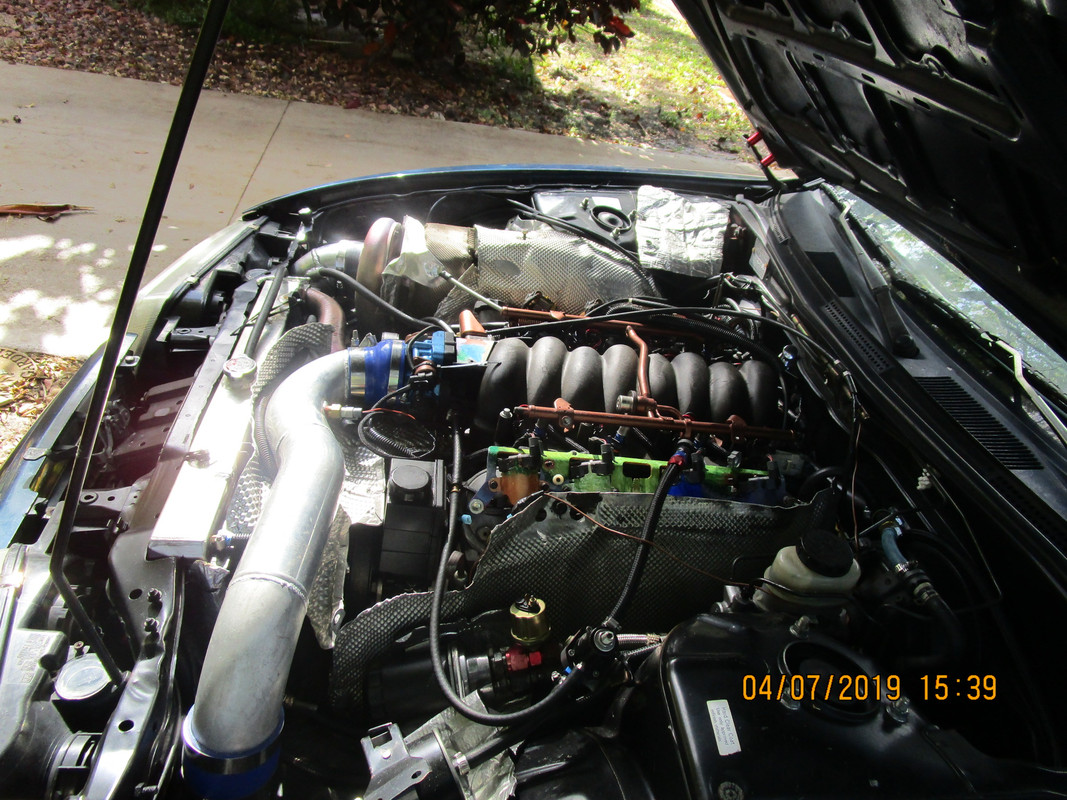
The turbo still has way more to give, this S364 will flow 850BHP worth of airflow! I can probably squeeze at least 640rwhp from this baby the way it is with a little alcohol in the mix. Heck it might not even need alcohol, but I am not sure the LM7 is the block for the job. 
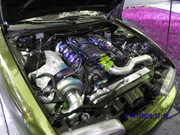
cough L33 what>? I am fond of water injection but this turbo isn't really big enough for this engine to use water effectively, I would want more like 105lb/min and run it up around 85 to 88lb/min (740rwhp?) with an L33 to justify the installation of a electric, maintenance item water pump, but 700+ just seems crazy in a car like this, I would need to start doing chassis stuff. I am already planning to do some minor things and lets see how that plays out first before we talk 800 to 1000. Because the minute you say 800 I say 1200. So that is why I went with 650 instead of 1300, basically decide whether you want to really "DO" the fuel system with huge lines and 2 pumps and plate the engine to the chassis and stiffen everything... doesn't seem like a good direction for a daily driver I need to drive in six months. So I chose to put a cheap single dash 5AN line on a factory size 5/16 hard line to the factory fuel dead-head fuel rail (so: not optimal lol it can't get much worse) I don't even use an EGT gauge because I am so confident it won't overheat if the air fuel stays down because 5.3L eats up 80lb/min like a 2L uses 80.37735 = 30lb/min, its like baby airflow rate territory for this massive displacement, nothing to worry about in theory.


My original goal for such low boost 14.5psi was to be at least 500 tire using a "free" engine (LM7 all day w/ 120-180k nearly free around here in SF, just add gaskets, cam and pan goes from engine to engine), reliably on pump fuel gasoline without the added expensive of additives or alcohol and to do so in the hottest part of the day/year under difficult conditions... and she really did pull through, for 3 years almost 30,000 miles so far... it keeps blowing away my expectations. Well actually it is meeting my expectations which was not expected. I don't deserve a car with 500hp thats for sure. The power is just a novelty to me; I don't race or have any interest in racing beyond track data for the sake of backing up the dyno with actual drag performance (they say the track is the real dyno :D 
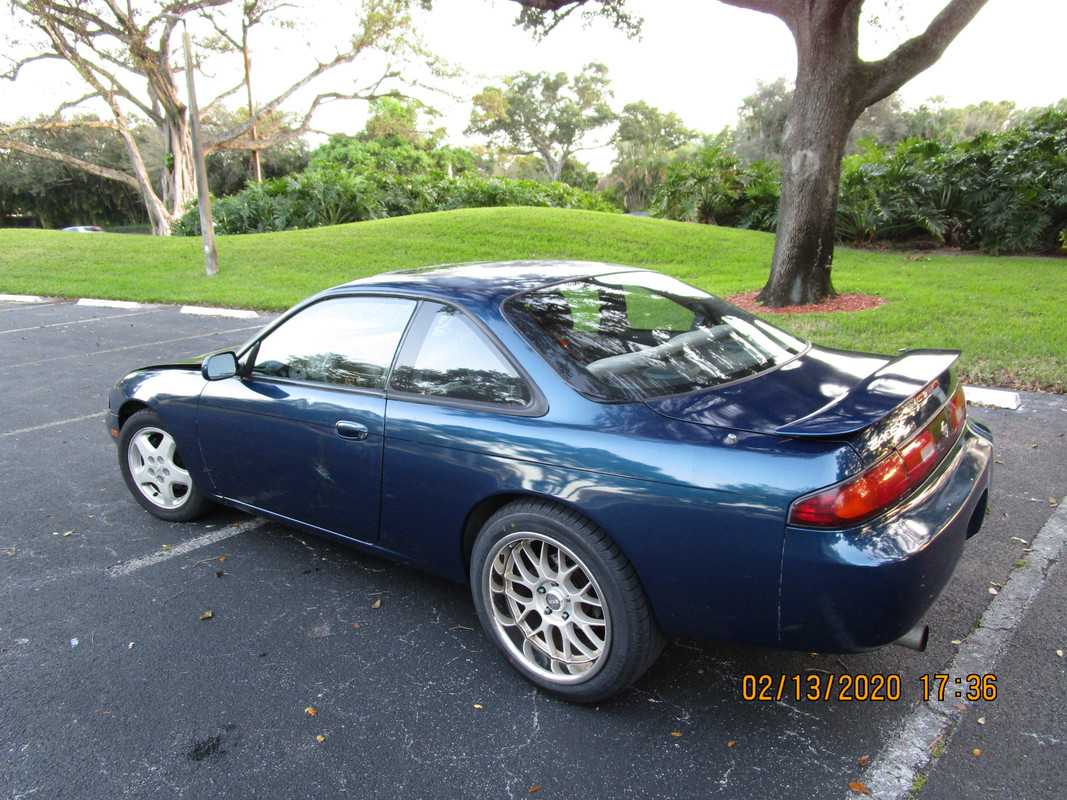
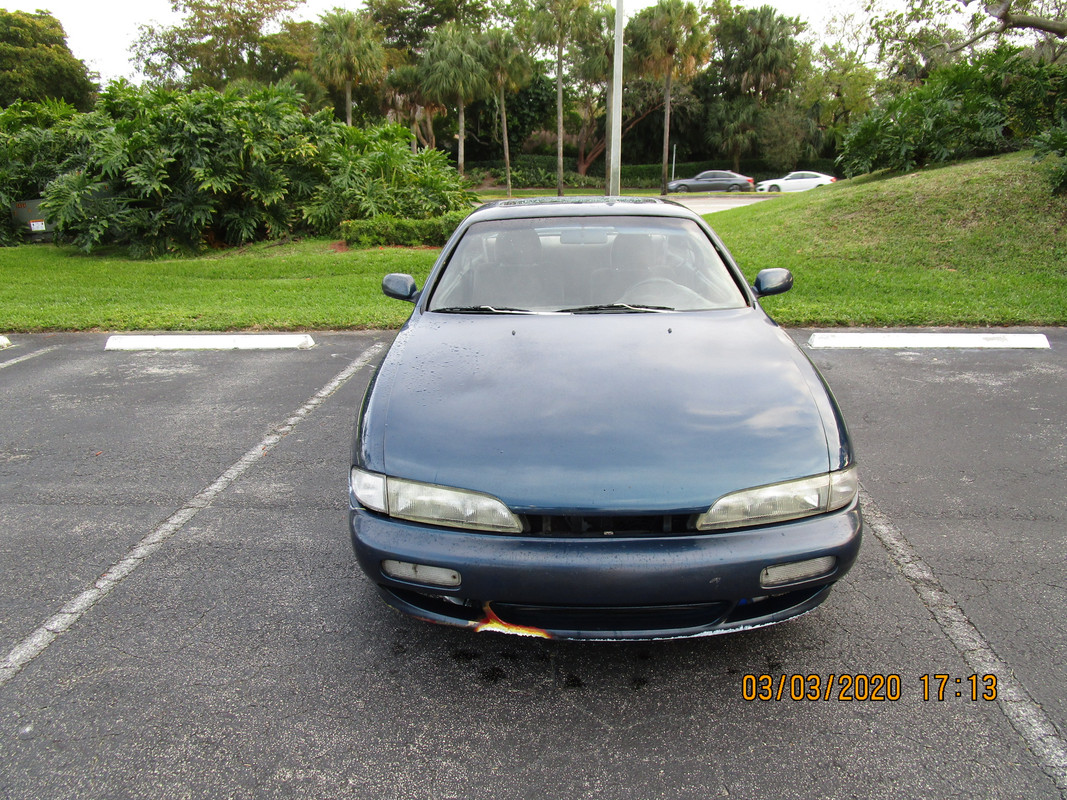
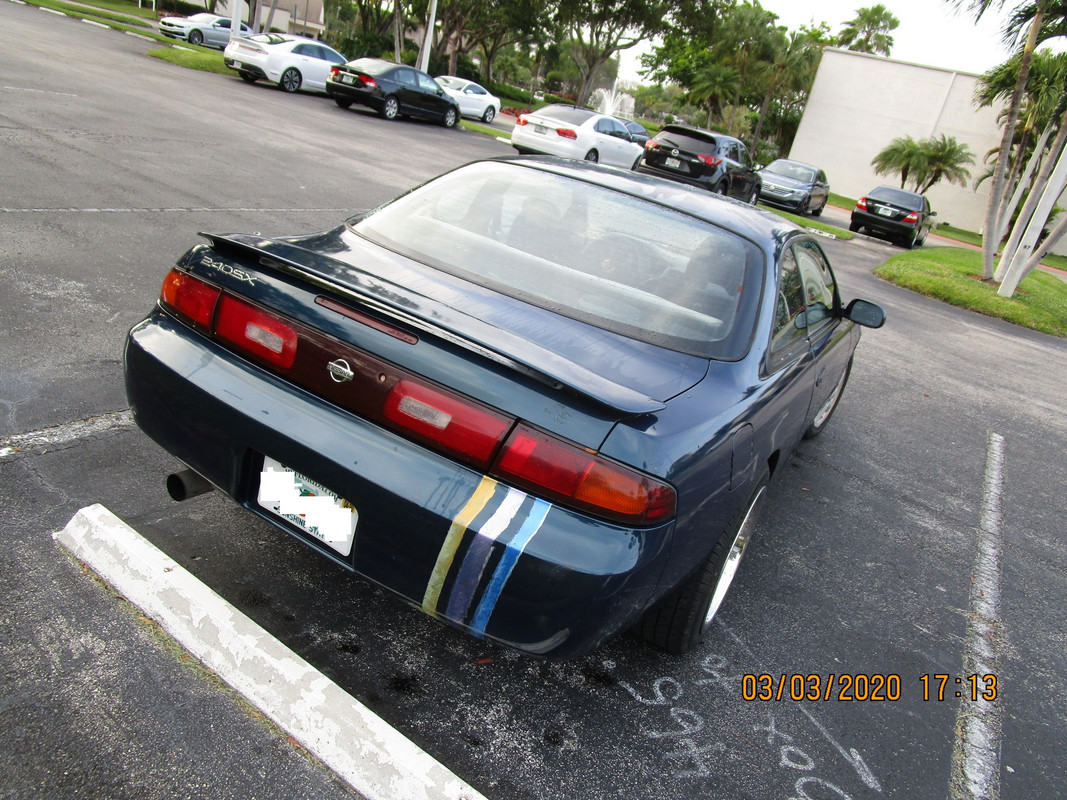
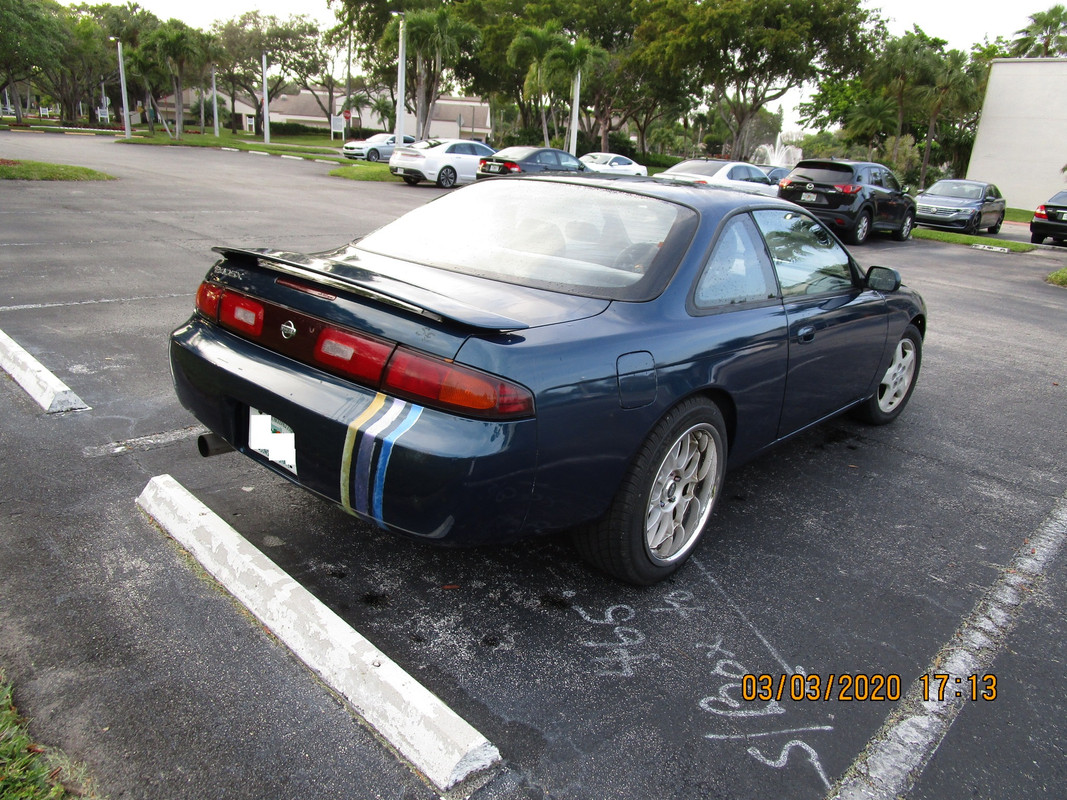
). The real fun for me though, is the way it handles, sounds, smells, the rough and tumble of it. I love to listen to the cam lope of a V8 with any amount of power... I would drive it with 200hp.
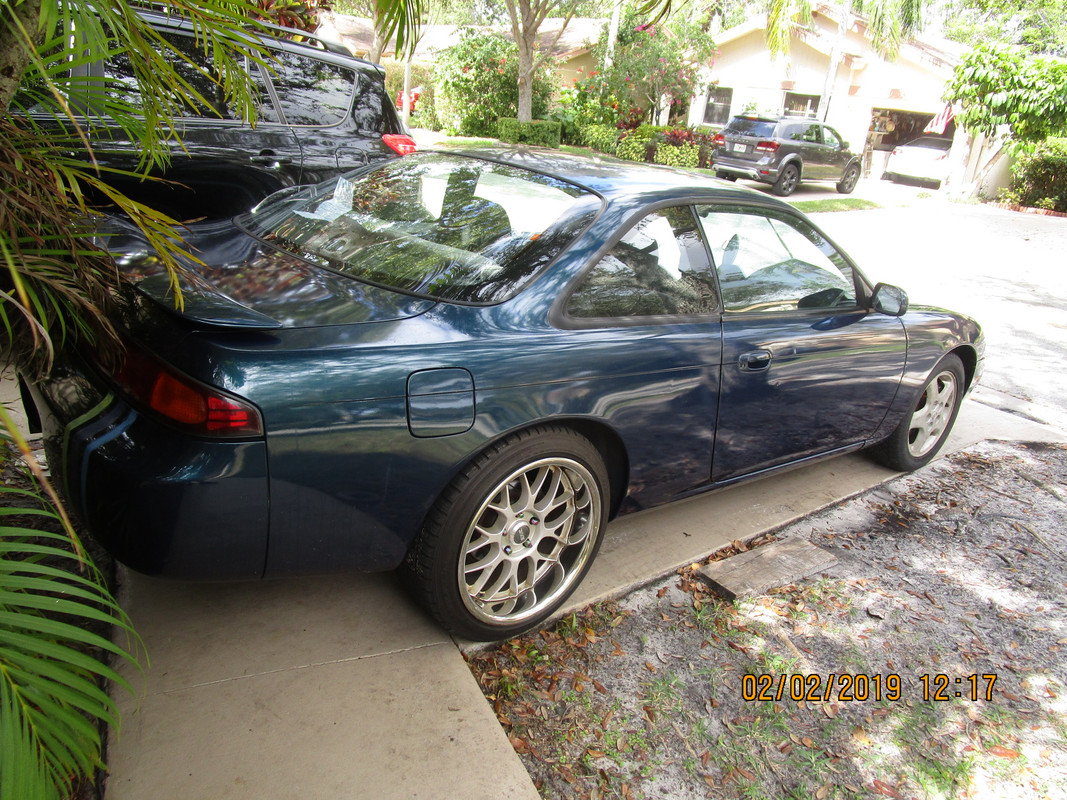
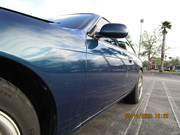
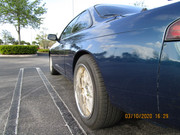
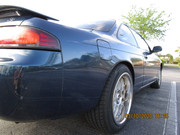
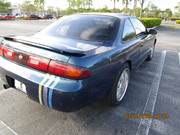
Its a rowdy straight shooter that intimidates when it wants to and purrs like a kitten the rest of the time. I can drive with 1 finger on the wheel, the other holding a camera or a drink. IRS means I can change tire height on the fly without suspension adjustments like an RX7 needs. The chassis is flexible with it's components and works with a wide range of parts. It has aluminum brakes from 300ZX which is a much heavier car so it stops fine from high speeds.
No matter how much power it makes you always want more and there is always a faster car.
So its more what we can do with the least tools and materials at our disposal. The common ore. Stuff that somebody junked into a yard. To them it had low compression and was worn out, to us its been broken in, loosened up and boost ready. It brings a tear to my eye to listen to, but that could just be the exhaust fumes.

In the future I will get a microphone and narrative over these type of video so you can get more information about how I go about these things. But for now this will have to do, I have to focus on research now, back to the lab for some H&E, dapi, dsDNA IHC, those kinds of lab experiments to determine quality of tissue samples for use in cancer study... the car really motivates me to drive to my lab since I can work as many hours as I want in this field. losing track of time while using a microtome is pretty fun A+ highly recommended.

youtube video of the dyno passes:

Thanks for watching! I want to make a 'how eye hptuners' type of video...